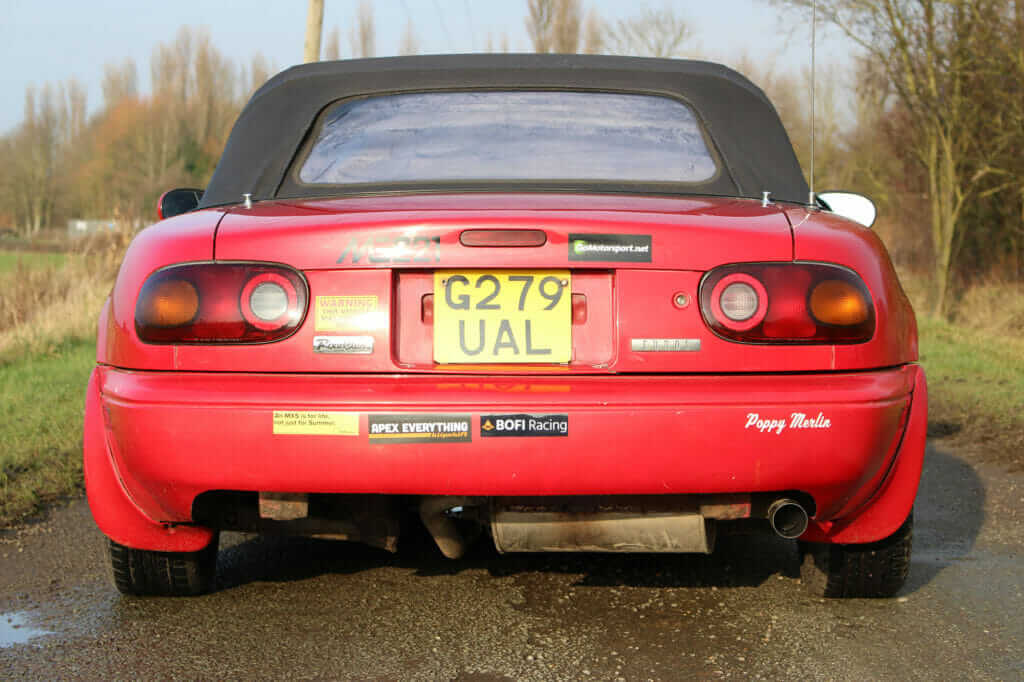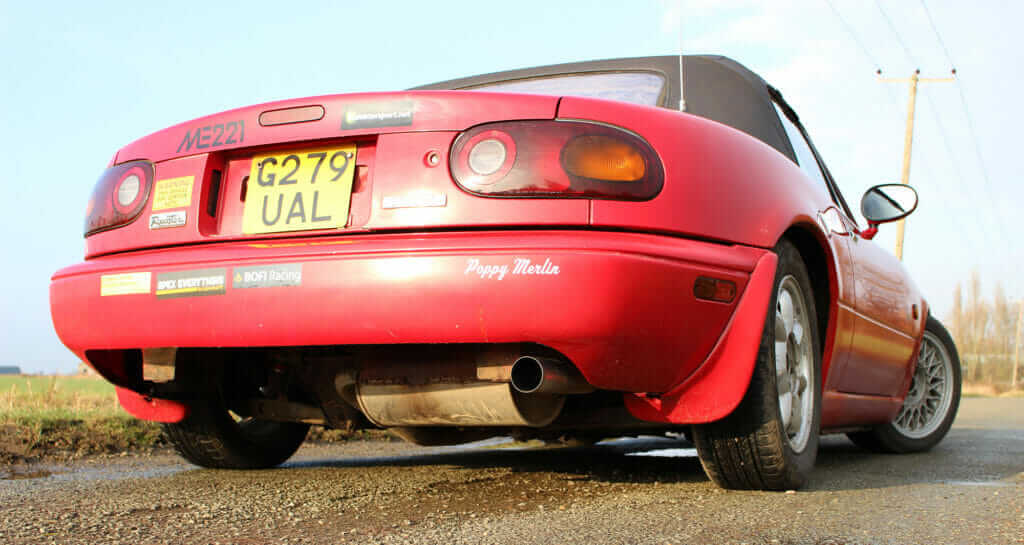
The rear bumper of an MX-5 is effectively a large parachute. The way it hangs down behind the exhaust silencer means it traps air. At best the trapped air will slow you down and at worst it will generate lift. In the name of driving fast, we want neither of these things and so the solution is to perform a bumper cut.
I wanted to make sure the bumper cut was as aesthetically pleasing as possible, whilst still being functional. The stock bumper has some complex curves that are important to the design of the car. The driver’s side of the bumper is actually quite interesting where it meets the cut out for the exhaust. I also wanted to keep part of the bumper that curves back under to compliment what the original designers gave to us. With this in mind, I prepared myself mentally to start hacking the bumper to bits.
How to perform a bumper cut
As the bumper was already off Gwyneth, I chose to do the cut with it off the car. It may have been easier with it on the car, as there was a good amount of flex in the bumper cover. This didn’t affect my results however, as I measured everything twice and took my time whilst making the cut.
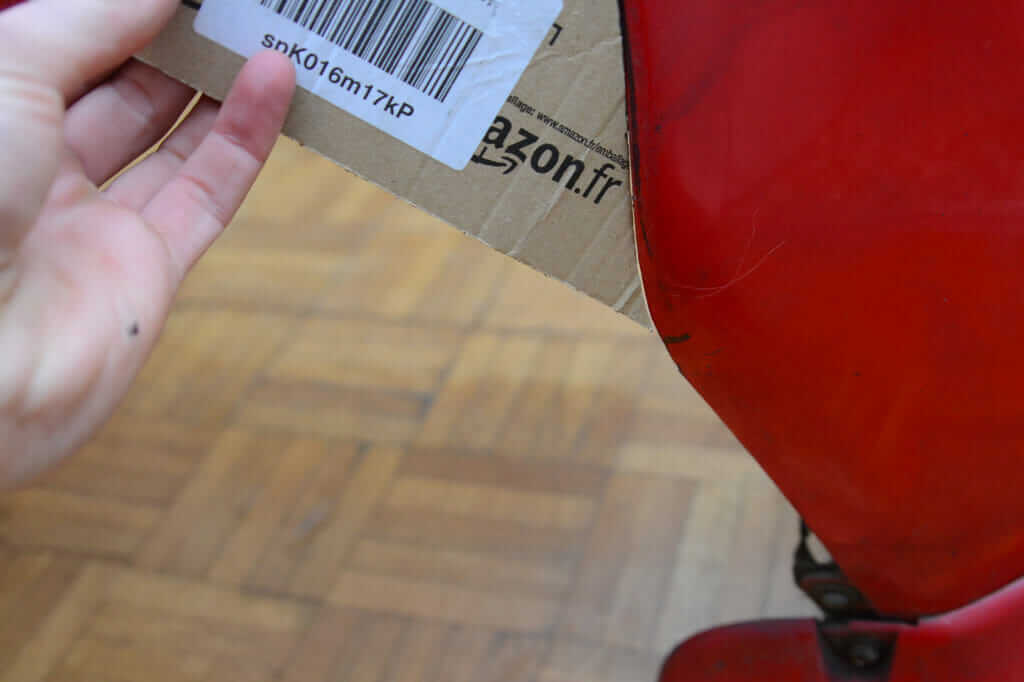
In order to cut your bumper you will need the following:
- Cardboard
- Permanent marker
- Measuring tape
- Scissors
- Cutting tools
- WD-40
- Bumper cut template
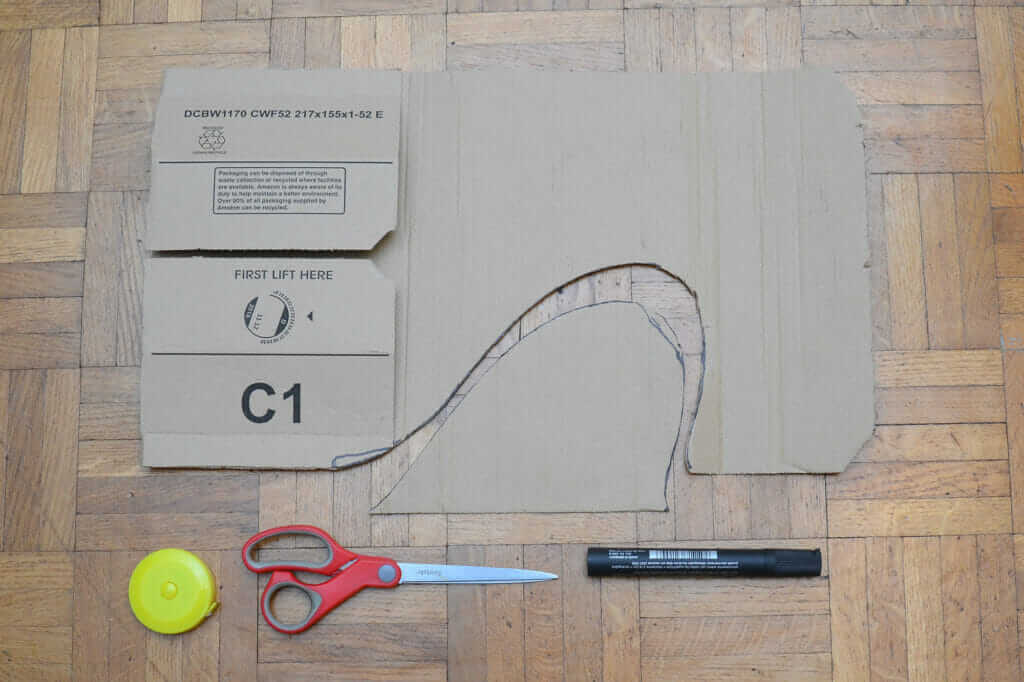
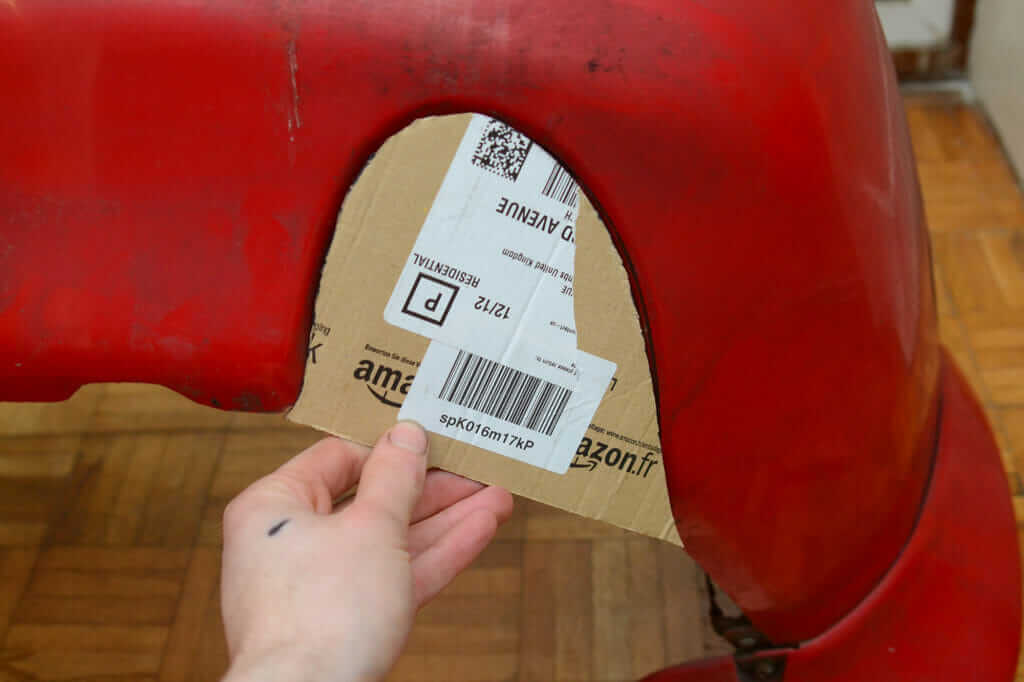
First, print off the bumper cut template of your choice and glue it to a piece of cardboard. Cut the template out and offer it up to the hole for the exhaust, checking that the profile is correct. Note how either side of the template matches the edge of the bumper; this will help position the template later.
Draw a line at the edge of the template to use as a reference point.
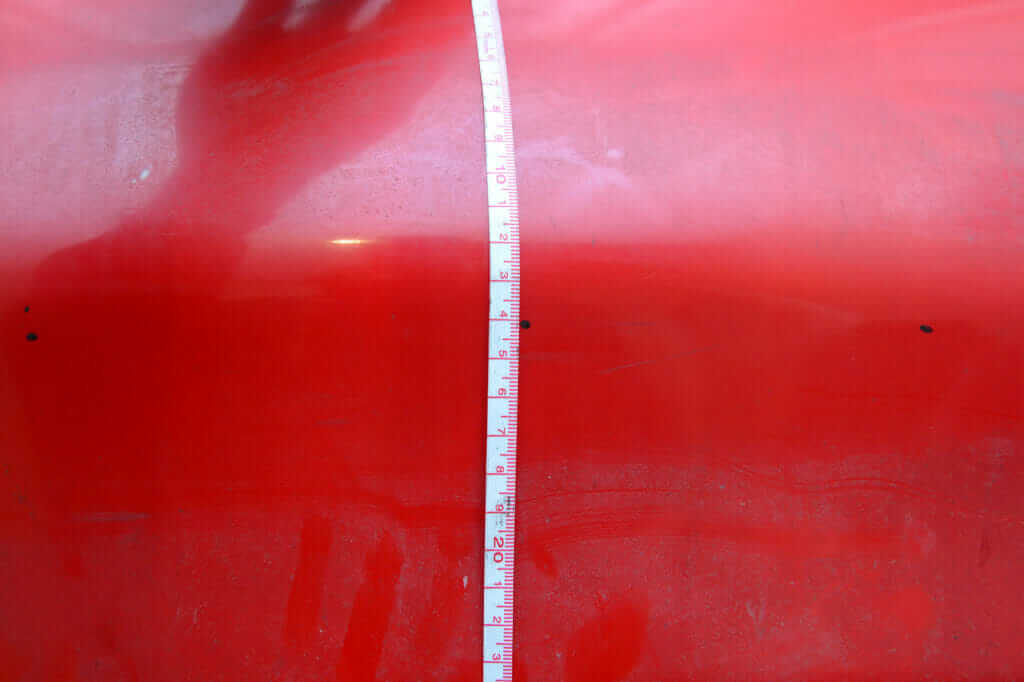
Then measure the distance from the end of the bumper to the line. A flexible tape makes it easier to measure the contours of the bumper accurately.
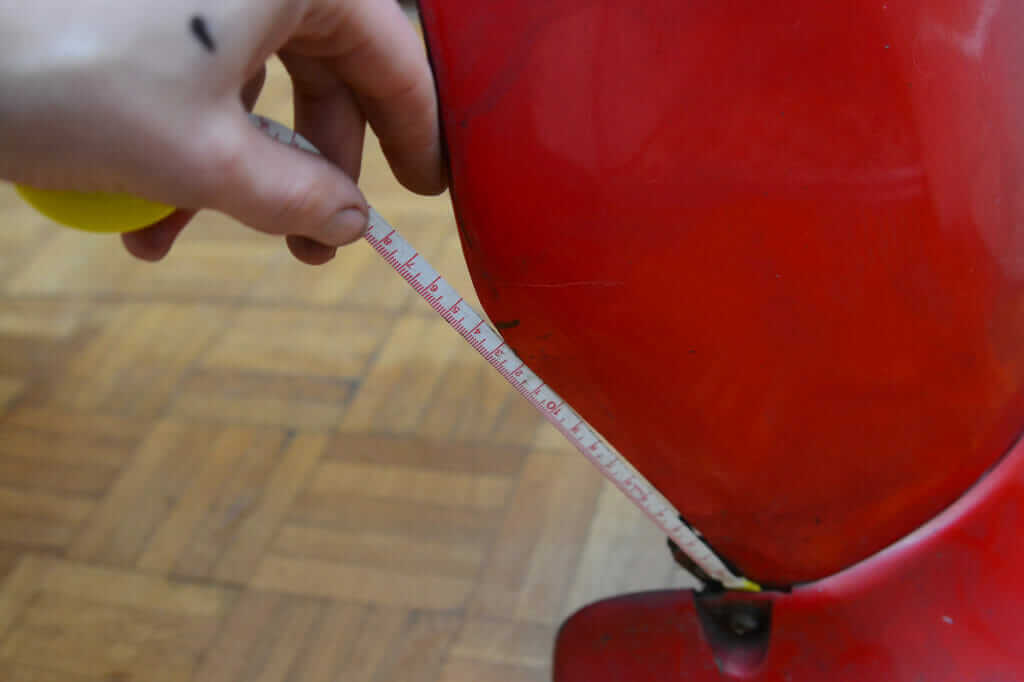
Transfer the measurement over to the other side of the bumper. Line the template up with the bumper and draw around it. Double check all your measurements to ensure the cut will be in the right place.
Measure the distance to the top of the factory exhaust hole. I placed the end of the tape into the recess in the bumper. This way I knew I was measuring from the same point the whole way across the bumper. I measured it at 14cm, as I was going to cut out the excess material so that it matched the other side.
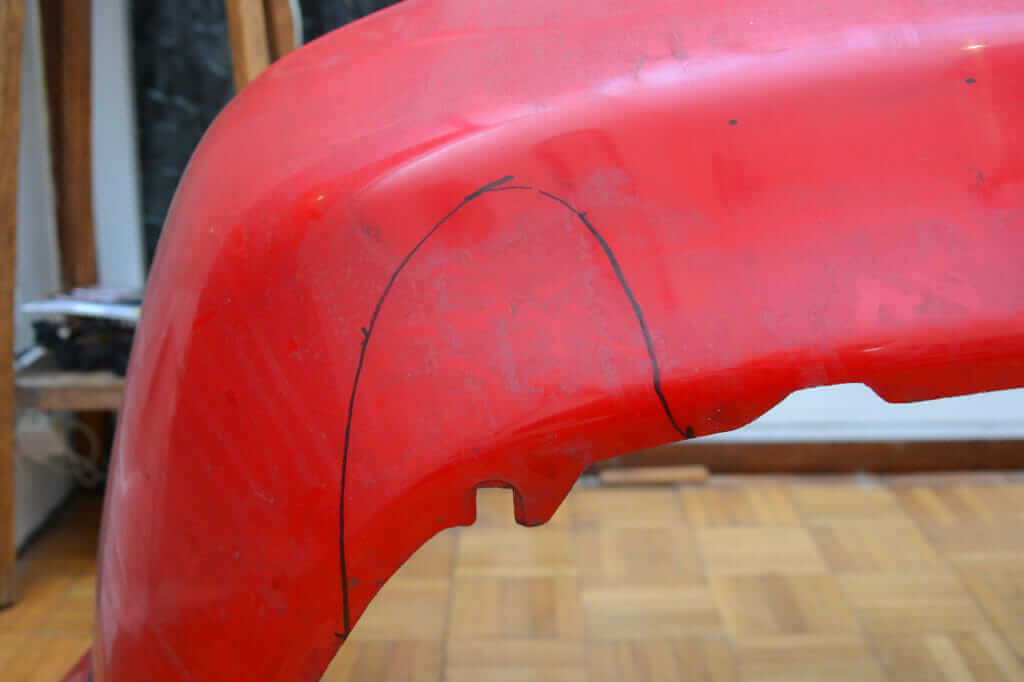
Transfer the measurements across the bumper. The more measurements made, the easier it is to draw a line between them. If there are too few, where each dot joins will have a large angle that will be harder to smooth out when making the cut.
Mark close to the line drawn around the template. Draw a line to connect the top of the new exhaust hole to the measurement you just made. This will allow the exhaust hole and the horizontal cut to meet as smoothly as possible.
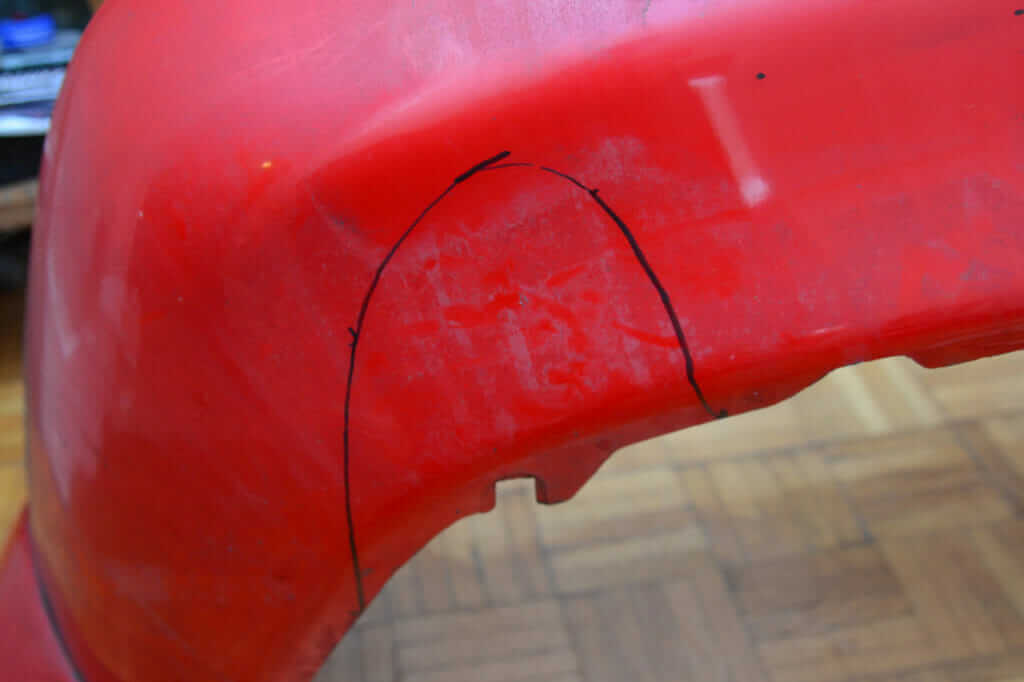
Join the remaining dots, using a straight edge. I used the leftover cardboard from my template, as it conformed to the shape of the bumper easily.

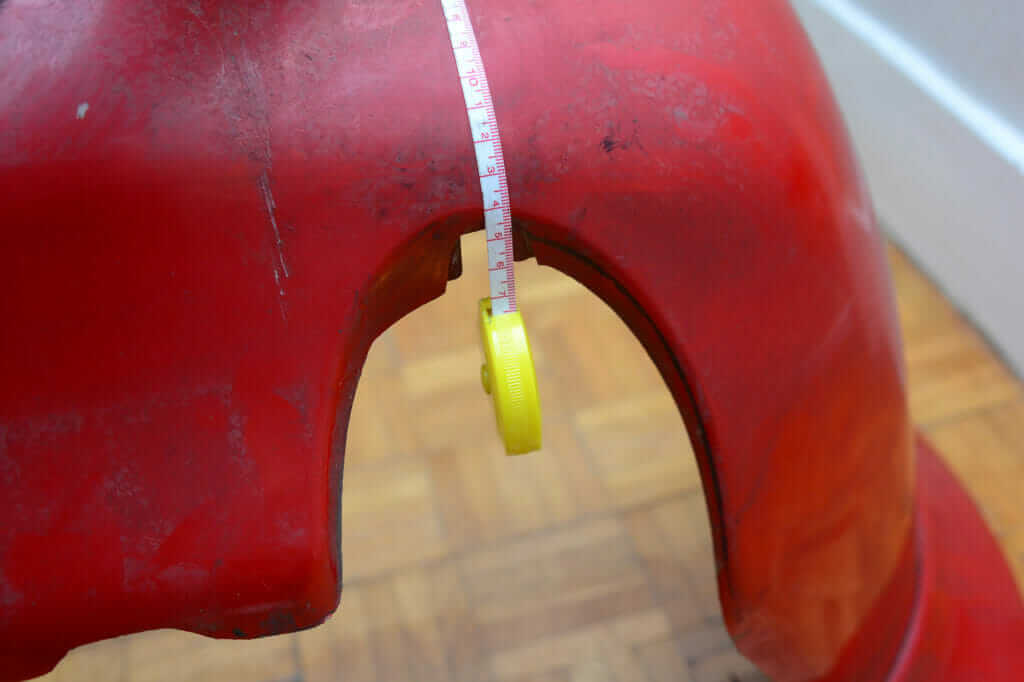
Begin cutting the bumper. I used a pruning saw, which was wholly inappropriate but actually did the job quite nicely. Using a hand tool, I was able to control what the blade was doing easily. I don’t think a sharp knife would have worked as well, as it could have slipped and removed more material than I wanted. Also, not having the pressure of a death wheel made it far simpler to achieve a curve instead of a series of straight cuts. The most important thing is to take your time and make the cut as smoothly as possible.
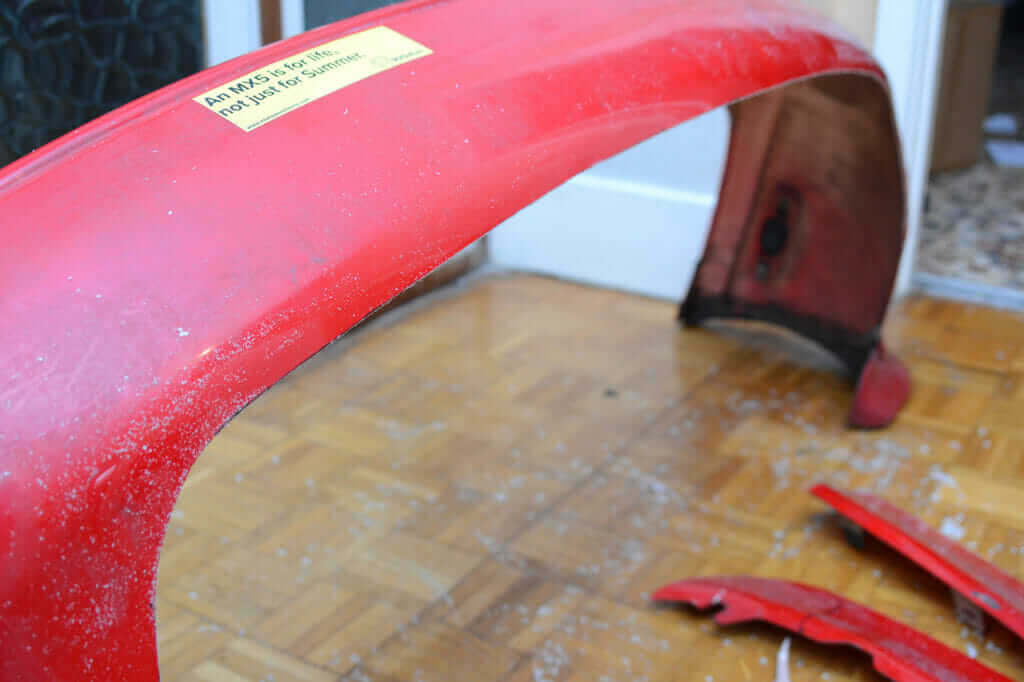
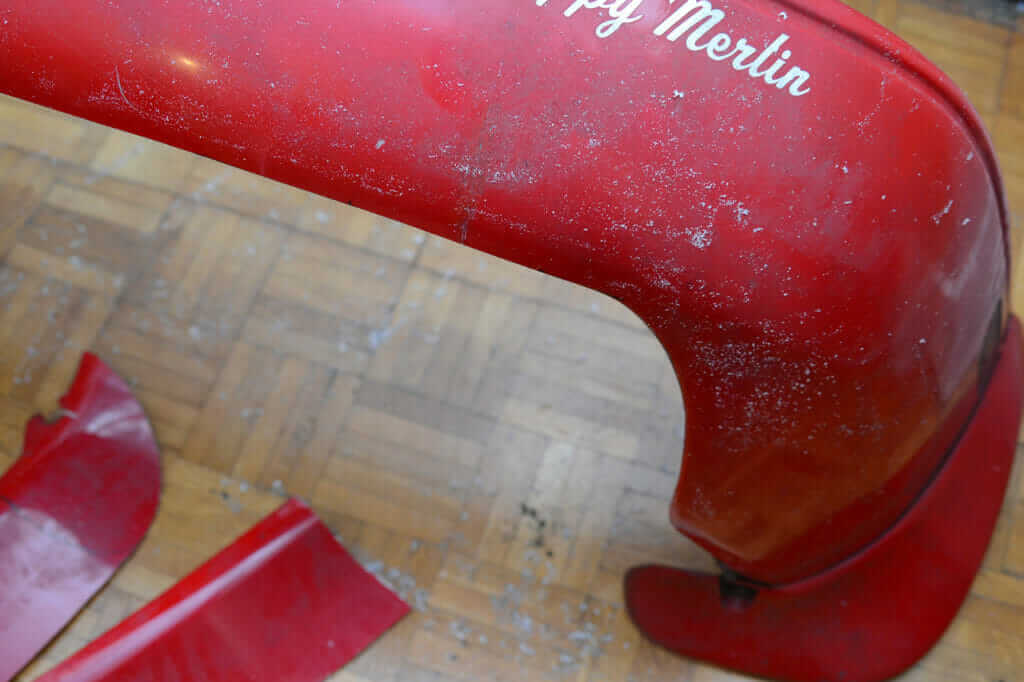
With the cut complete, begin smoothing the cut edges with sandpaper. Start off with a relatively coarse grit such as a 120, and move to a 240 for the final pass. Below is where I removed the excess plastic around the exhaust tip to match the new cut. Then remove any leftover permanent marker with WD-40.
Cut the inner bumper to suit. Because mine was already off the car I chose to saw it in half. Reassemble the car by attaching the bumper cover to the inner bumper and bolting it back in place.

Stand back, admire your handy work and celebrate with a cup of tea.