For the first time since August, Gwyneth finally sat with all her panels on. Granted—the wing and light cover were still painted in red oxide, but at least she looked like she was ready for the road.
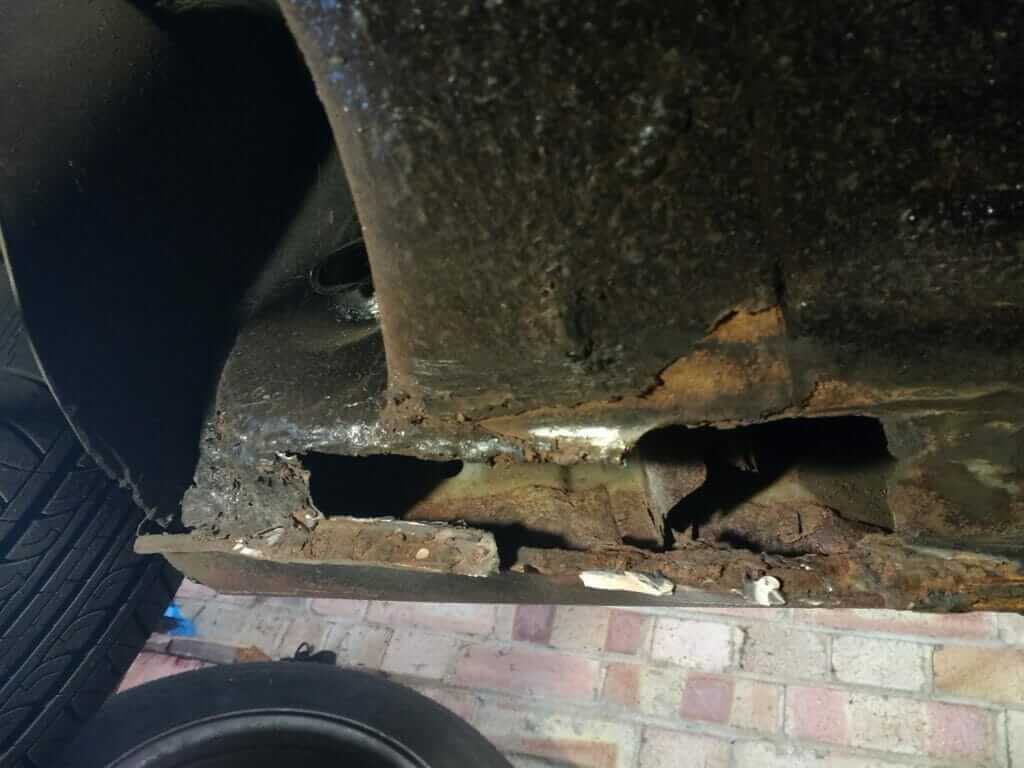
Whilst still up on axle stands, I started undersealing her ready for winter. As I shimmied my way under the car, the driver’s side footwell presented a rather frustrating finding—yet more rust. This time the hole was in the driver side chassis rail, where it meets the footwell. I understand that Mazda tried their hardest to replicate the classic British sports car, and they certainly got the melting into the ground part nailed.

Having spent a good deal of time welding up the front passenger side sill, one more hole to fix wasn’t a big concern – even if the A-arm being in the way made access less than ideal. So out came the welder and she was patched up before lunch.
Underseal: Attempt Two
After lunch and back under the car the underseal came out once more. This time there was some success to be had, painting over the exposed parts of the chassis where the old underseal had dried out and flaked off. Working my way towards the back of the car I was feeling optimistic that I could get Gwyneth MOT’d for the weekend.
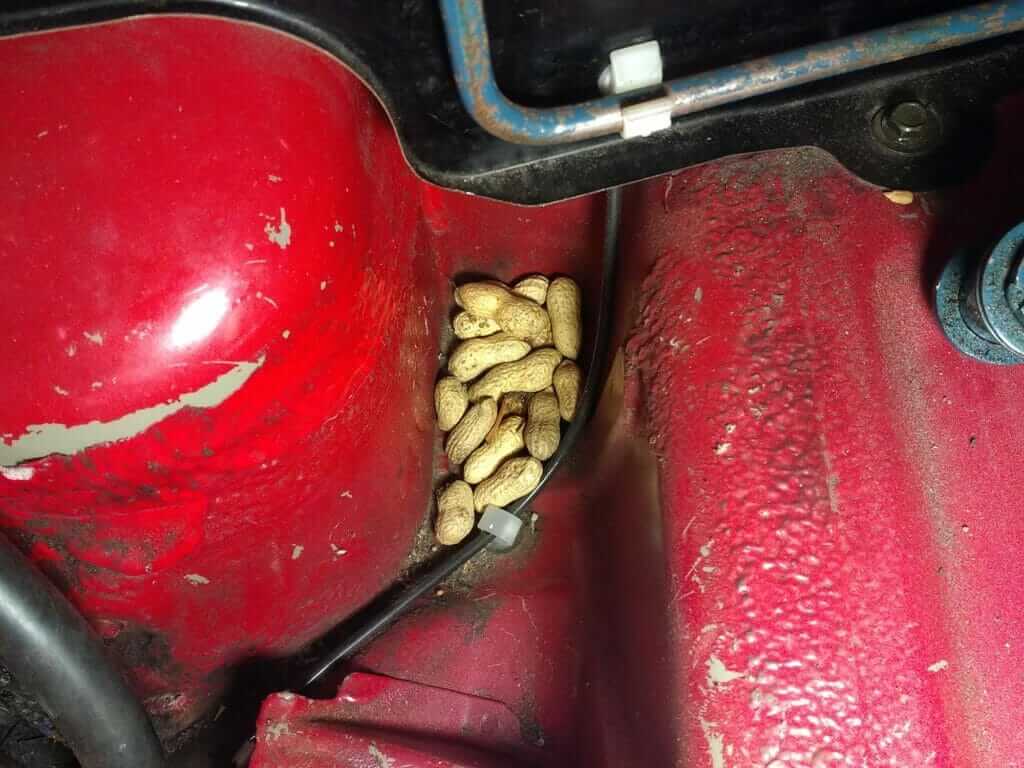
Unfortunately I found yet more rot at the back! This time it was the passenger side sill that required attention. I didn’t believe that the passenger side of UK cars fared the worst, but it was certainly proving to be the case. All the salt and slush collecting on the side of the road definitely takes its toll.
Taking a grinder to the offending metal, I was able to see what we were working with. In this case, not a lot!
With another hole confirming we weren’t done with the welder yet, I thought I had better take the time to give the car a thorough prod.
By the time I’d finished poking, I was looking at quite a list:
- The near-side rear wheel well was rotten—both at the front and at the rear
- The off-side front wheel well was rusted behind the wheel arch liner
- The near-side passenger foot well was corroded in the same place as the driver side
At this point, I was confident that I had found all of the grot on the car. At least I knew where I stood.
Pulling out the welder for the final time, I was able to get most of the bodywork patched up by the evening. The next time I was in the garage, Gwyneth was successfully stitched up and coated liberally with seam sealer.
Underseal: Attempt Three
Now back to the black stuff. Third time lucky…
Whilst working around the suspension arms, I noticed a rather flaky bit in the near-side rear wishbone. Screwdriver in hand, I gave it a good poke.
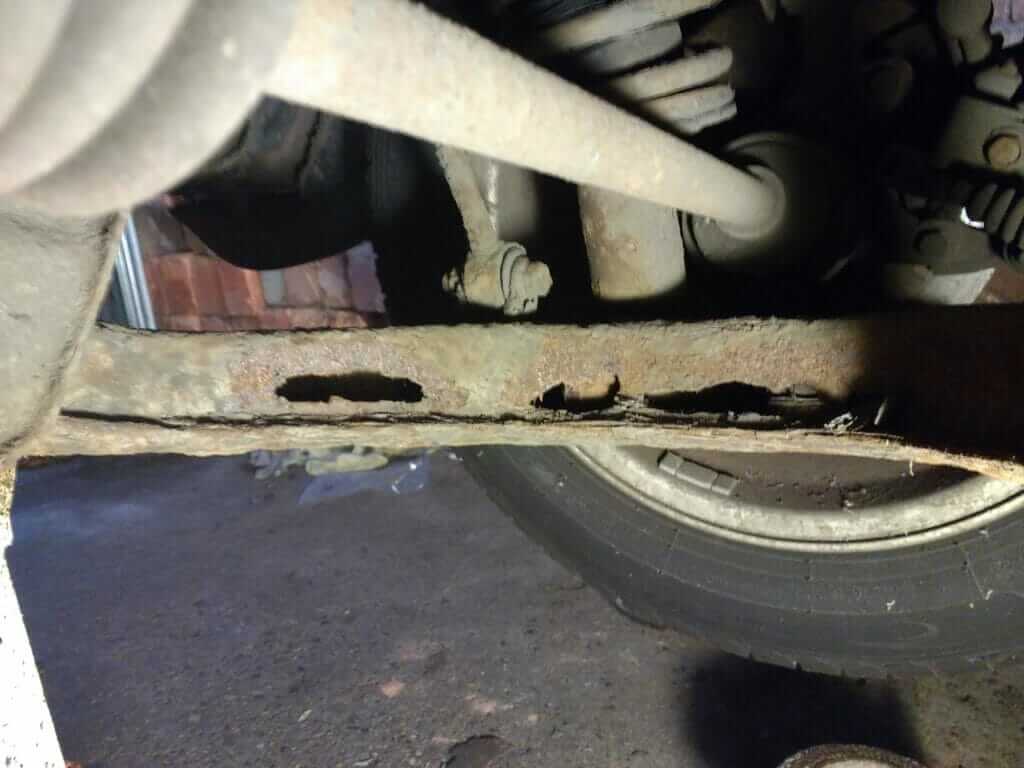
Further investigation found that the off-side wishbone had been previously welded! A quick post on one of the Facebook groups turned up a set of wishbones for cheap, but I wasn’t looking forward to breaking through the years of crust to rip the old ones off.
The long bolts through the bottom of the hub were especially stubborn, requiring a liberal dose of Plusgas and a big hammer to draw them out. Predictably, two camber bolts were refusing to budge and snapped off in the process.
The captive nuts in the rear wishbone that hold the struts were spinning, so the bolt would not come out. The trusty grinder relieved enough space in the wishbone for a spanner to hold the nut whilst the bolt was wound out.
The final thing preventing the removal of the wishbones were the droplinks. The bottom bolts were refusing to come undone, so the top bolts were removed instead and the wishbones were dropped to the ground. One of the metal sleeves had slipped out of the perished rubber, so it was back to Facebook once again for a good set of droplinks.
As for the bolts, Autolink came to the rescue, replacing them all for a good price.
Nut so fast
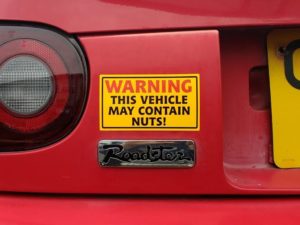
Reaching into the boot to undo the bolts on the top mounts revealed a secret that Gwyneth had been hiding from us. Considering that up until this point I hadn’t found any strange paraphernalia or human slime, this considerable hoard of peanuts came as quite a surprise.
Dropping the struts from the car revealed a broken spring. Whilst coilovers were always on the wishlist, it now made sense to pick up a set sooner rather than later. With that in mind, I moved to the front of the car and removed the camber bolts to make removing the struts much easier. She was going to need an alignment anyway, and it made sense to get the camber bolts free rather than struggling with them at the alignment shop.
Referencing the list from the previous installment in this series, we had made reasonable progress – albeit a little slower than anticipated.
Floor, sill, and wheel well paintingFloor undersealingWing bolting onBumper bolting onHeadlight cover bolting on- Undertray bolting on
- New battery
- Passenger indicator and reflector
Now that Gwyneth is solid, in part four we’ll be installing coilovers and completing the final jobs to get her ready for the road.
For my own amusement, I’ve left the peanuts in the boot and slapped on a sticker.