With Gwyneth sat all sorry for herself on the drive, we needed to assess exactly what the extent of the damage was. On the surface, we would see that the passenger headlight wouldn’t go down and that the wing was crumpled at the front, but we didn’t know what lurked underneath. It was time to start pulling panels off.
Working our way along the top of the wing from the windscreen to the front, the bolts come out easily. That is, until the bolt nearest the bumper shears off, setting the scene for the rest of the day.
Moving to the three bolts along the bottom of the wing, the situation was even worse. A quick turn of the ratchet and what was supposed to be the sill falls to the ground. Bugger. Well, we weren’t expecting to get off entirely scot-free, not for £250.
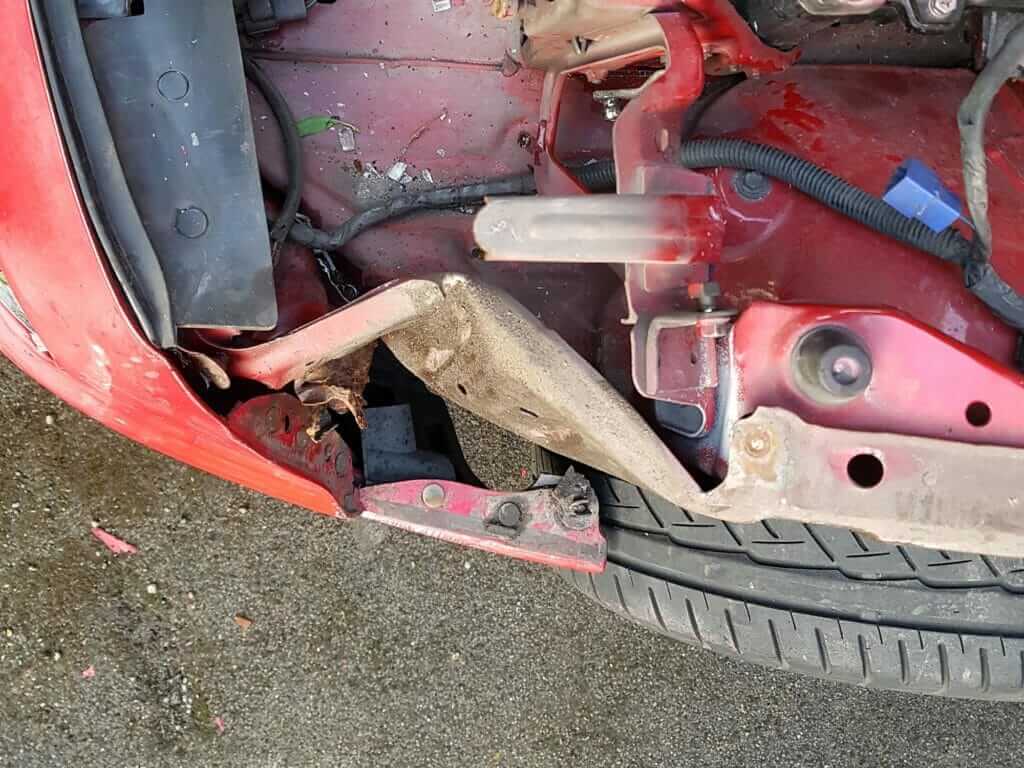
With the wing released from the car, it becomes clear why the headlight wouldn’t go down—the inner wing had been pushed inward, wedging the headlight up. Looking at how the metal had folded into the void left by the headlight, it was probably lucky that they were up when the bump happened.
Having removed the headlight, we could see the full extent of the damage. Luckily, the chassis rail was untouched—we would just need to straighten out the side and bottom of the inner wing. Looking at what were faced with, we were hopeful we would be able to pull most of the metal back into shape in just an afternoon.
Out came the lump hammer and a big block of wood.
In just a few minutes, the fold that had wedged the headlight up was back where it should have been. To straighten the bottom of the inner wing (which had become folded under itself) a hole was drilled into the surround that houses the indicator and a slide hammer was attached with a bolt. Several strong cups of tea later, the front of the car was looking like it could be buttoned back up in no time.
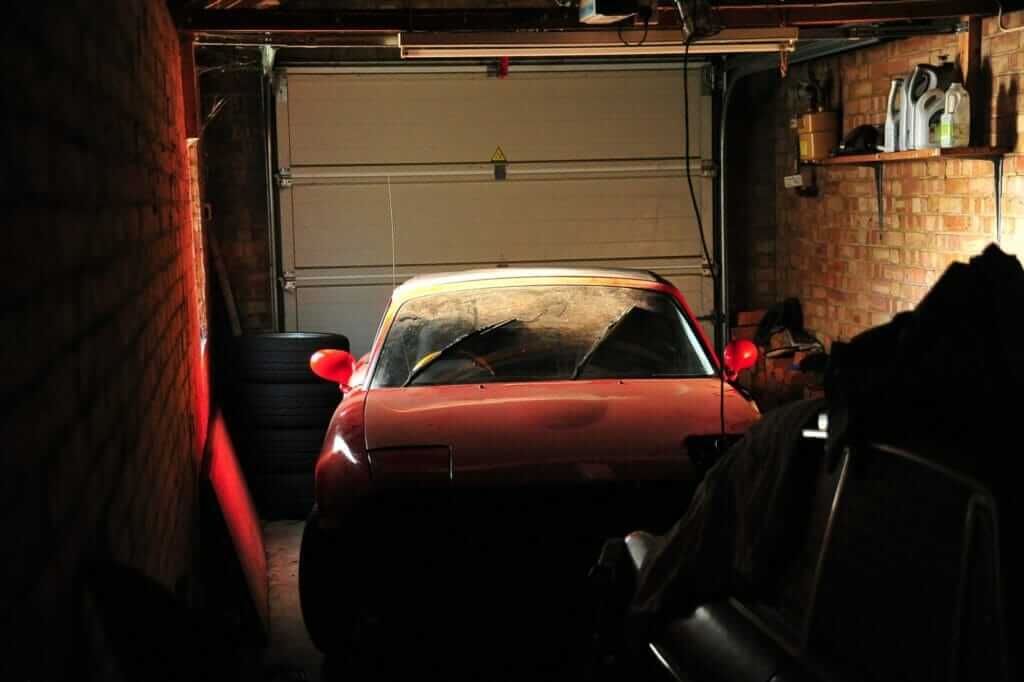
With the weather taking a turn down the long wintery road, some shelter was in order. The garage houses a predictably rusty relic of British Leyland history, plus the sensible half’s daily. Gail, BOFI’s turbo NB has to endure the elements outside. A plan was formulated to acquire the rest of the garage. “It should only take a week” seemed to do the trick, even if it was a little white lie.
A Lust for Rust
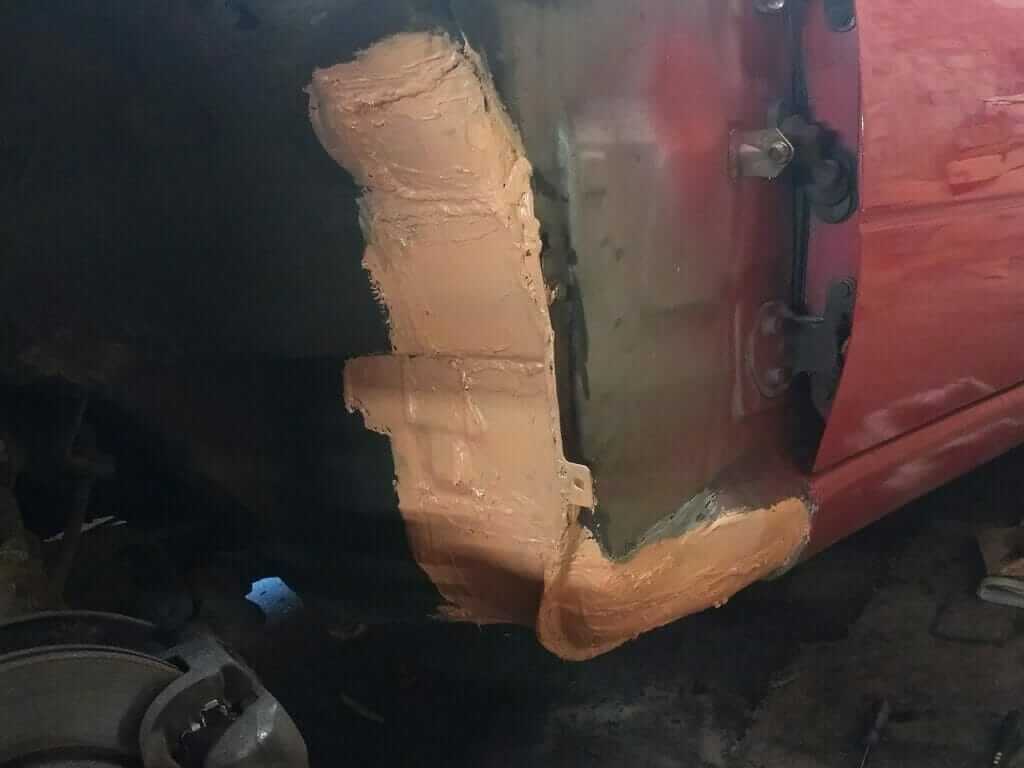
With Gwyneth now in the dry, the rust needed to be fixed so that there was actually somewhere to bolt the wing to. Out came the grinder and the flap wheels to uncover just what Gwyneth had been hiding from us.
Oh no! Our precious, angelic Gwyneth is a dirty rotter. The grinder made easy work of rust, showering a fine spray of brown dust across the garage. Our Roadster was going to require a lot more work than we first thought.
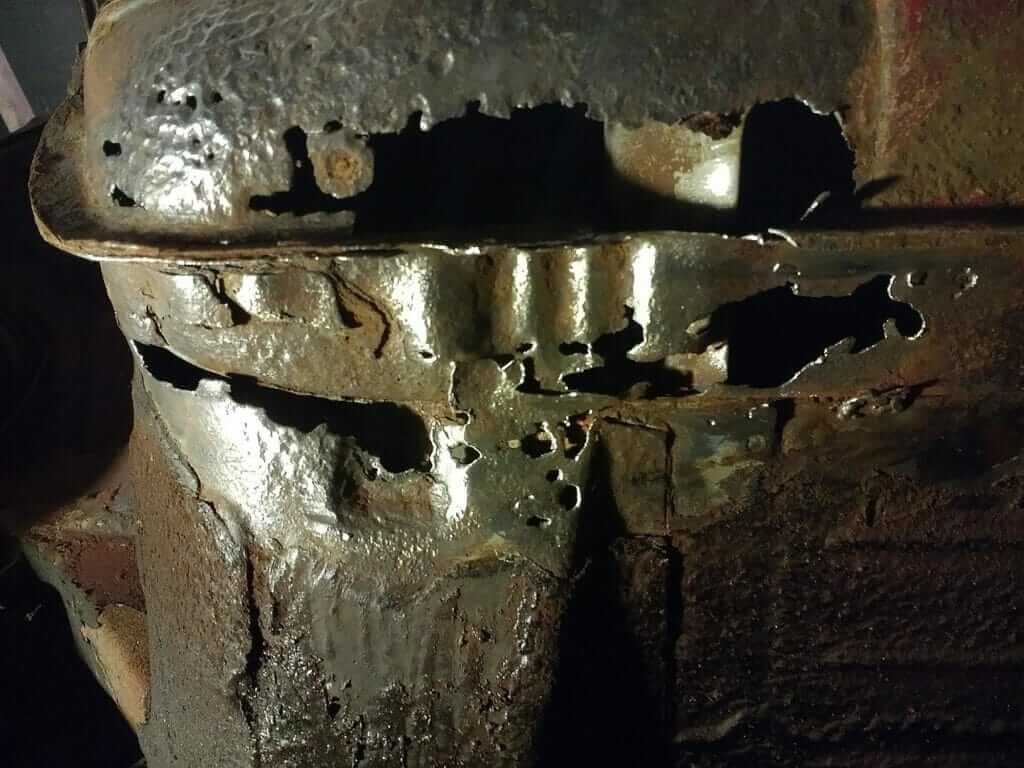
Removing the wheel arch liner revealed also a sizable hole in the wheel well. By the time the flap wheel had finished it’s work, there was more air than bodywork left. Shiny paint appears to not stand for a lot.
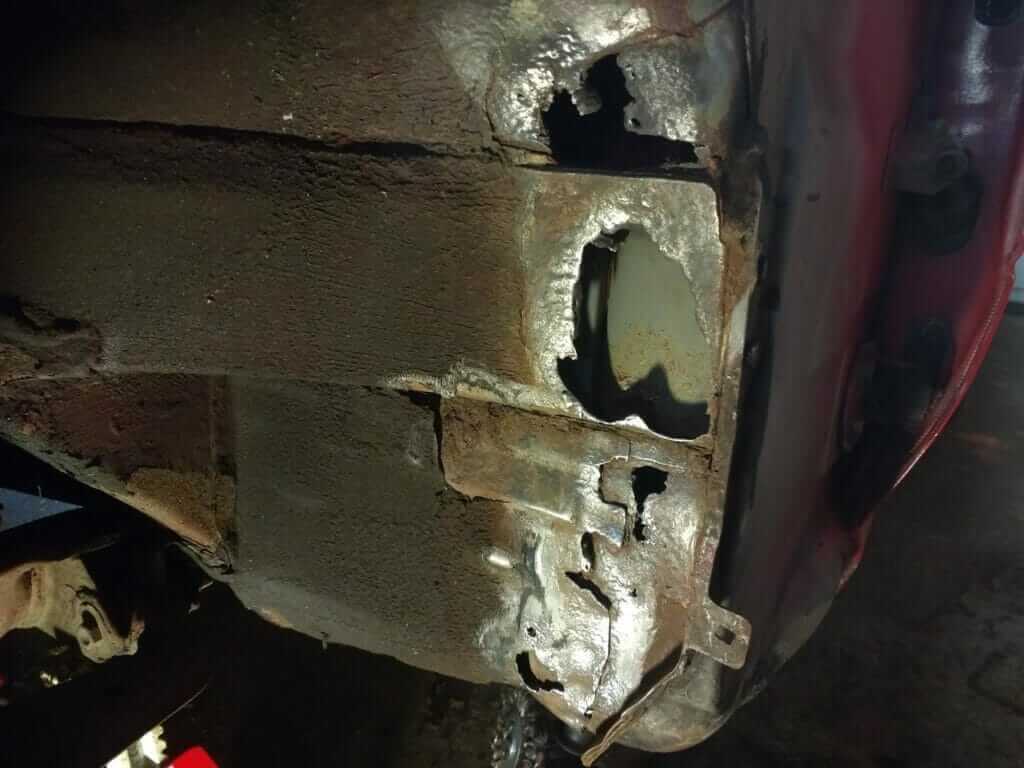
With the sill and the wheel well down to bare metal, it was time to check the floor. Looking under the car, some rather suspect repairs made themselves known. Several patches had been tacked on, and some of the welds having not even penetrated the metal beneath. Yuck.
Just a pair of pliers pulled the majority of the patches off. After releasing the stubborn welds with a cutting disc, the rest of the rust in the floor was removed. Once we could see all of the pitted metal, it was time to cut it out to make way for fresh steel.
New Metal
With Gwyneth resembling a colander more than a car, we could begin welding her back up. First, CAD templates (cardboard aided design—gratuitously lifted from Bad Obsession Motorsport) were created, allowing us to make use of the sheet metal we had. Carefully cutting each patch out with tin snips, they were tacked into place before being welded the entire way around each edge.
Having repaired the wheel well, the floor, the inner sill and the outer sill, seam sealer was applied along each weld. Next, two coats of rust killing primer were applied and the wing was ready to go back on.
What had first seemed like a solid bargain has quickly turned into a fairly substantial repair job. Having only removed one panel, it was clear that buying a SORN’d car with a flaky (pun intended) history perhaps wasn’t the wisest decision…
Before we can take Gwyneth to the MOT station she needs:
- Floor, sill, and wheel well painting
- Floor undersealing
- Wing bolting on
- Bumper bolting on
- Headlight cover bolting on
- Undertray bolting on
- New battery
- Passenger indicator and reflector
And as there is no history for the car, from a maintenance perspective she would benefit from:
- Fully synthetic oil, ahead of all the imminent thrashing
- Fully synthetic gearbox oil, as above
Fully synthetic differential oilWe’re on the lookout for a 4.3 LSD to replace the open diff
- Spark plugs
- Air filter
- Oil filter
- Coolant
- Brake fluid
- Clutch fluid
Not a lot then. Gulp.
