
In our latest Video we rebuilt Dan’s sloppy shifter in his NB1. Here’s why you MUST do the same. Shifter feel is a big part of your driving experience and you might not realise quite how sloppy your shifter really is, until you totally refresh it with a Shifter Rebuild kit.
-


 From: £53.55 inc. VAT Add to basket
 -

-
-
-
-
But can a few plastic bushes and a couple of metal wave washers really transform your sloppy shifter into a tight, precise one? We installed a rebuild kit into Dans NB1 to find out for ourselves.
If you haven’t done any shifter maintenance since owning your MX-5, chances are the conditions are going to be pretty poor under there. As seen on Dan’s car, the lower and upper shift boots had almost totally disintegrated, this’ll let nasty fumes, smells and noise into the car as well as not keeping the heat insulated nearly as well as a set of in-tact bushes and boots will.
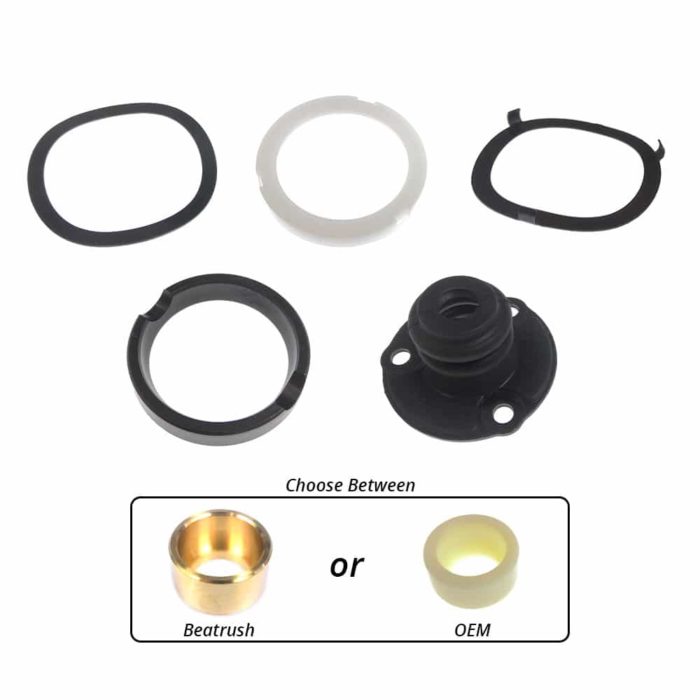
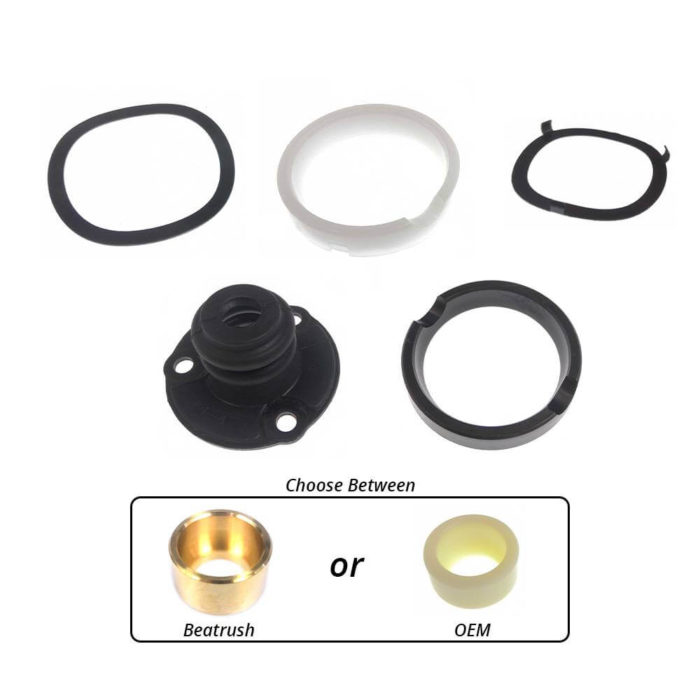
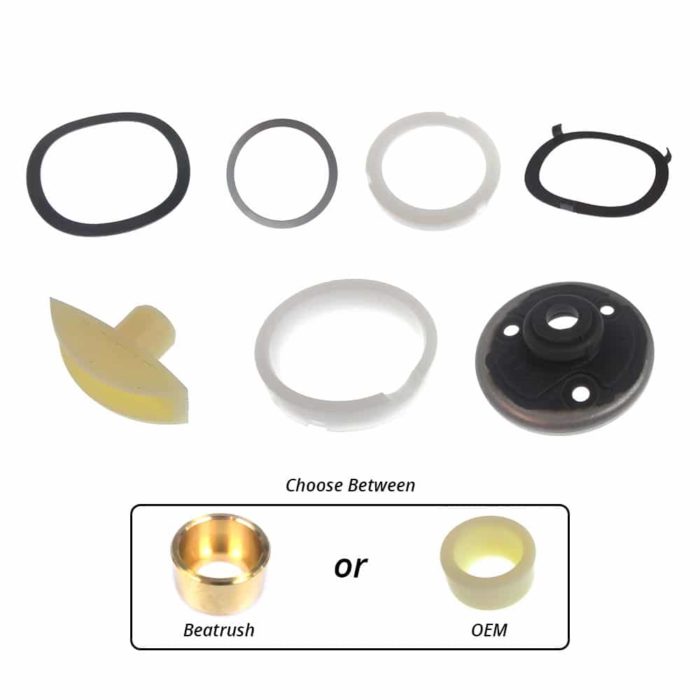
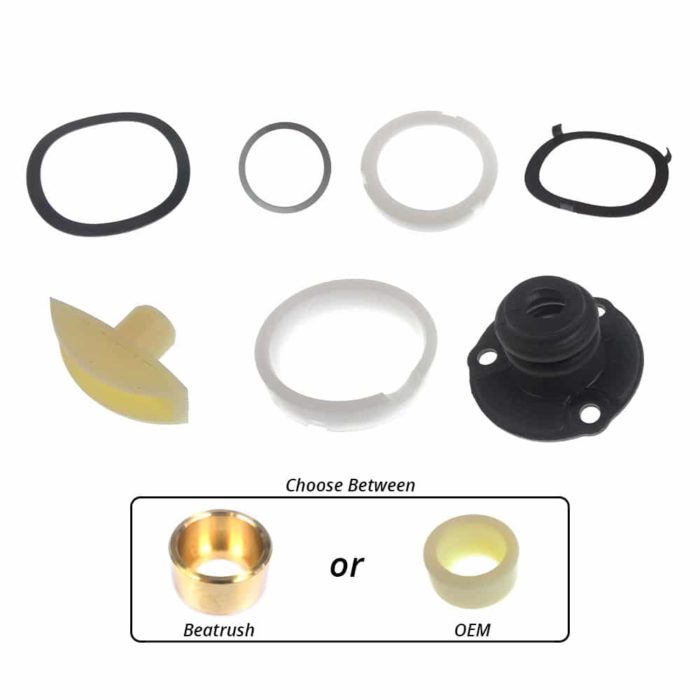
For this rebuild, we specified a Beatrush Bronze shifter bush and a Jass performance upper shift boot.
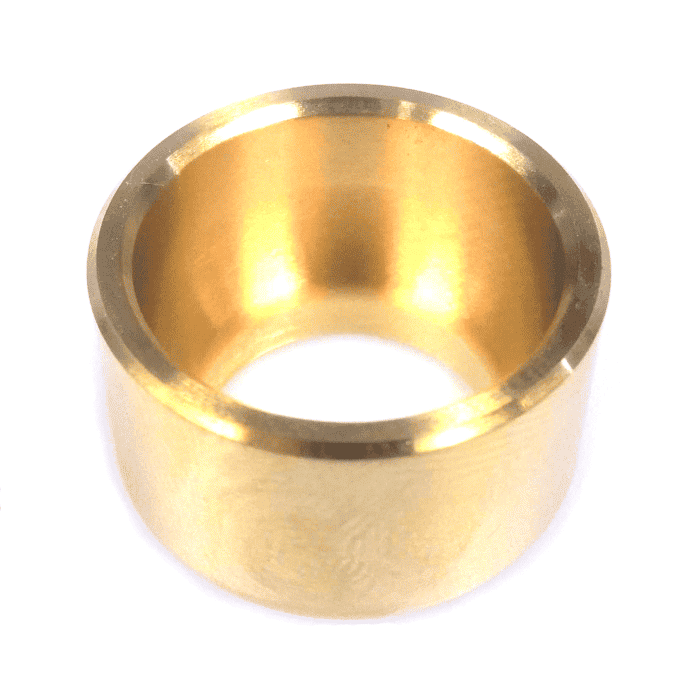
The Beatrush bush is a considerable upgrade over the OEM Nylon shift bush, being made of metal, it won’t stretch and wear nearly as much over time, it’s specifically designed to reduce play in the shaft when changing gears. This is an upgrade we definitely recommend.
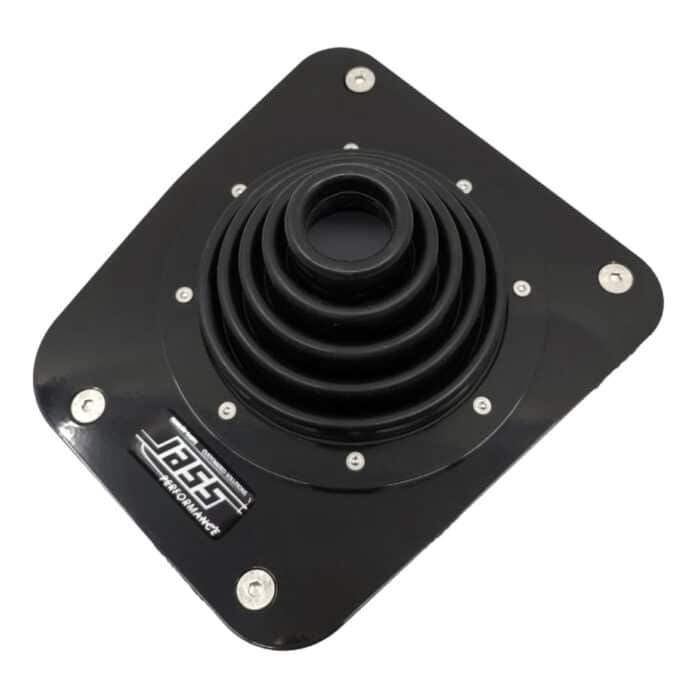
The Jass Performance Upper shift boot is a recommended upgrade to go along with your shifter rebuild as they’re rated to withstand the vibration and heat produced by the car for a lot longer than the OEM equivalent, a worthwhile upgrade because it doesn’t take a long time for those boots to start disintegrating.
Tools required are minimal: A Phillips head screwdriver, a ratchet with 10mm socket with ratchet extension, something to pry with e.g. flathead screwdriver and a syringe to suck out the old turret fluid (other methods work, a turkey baster is a common tool used to suck the fluid out).
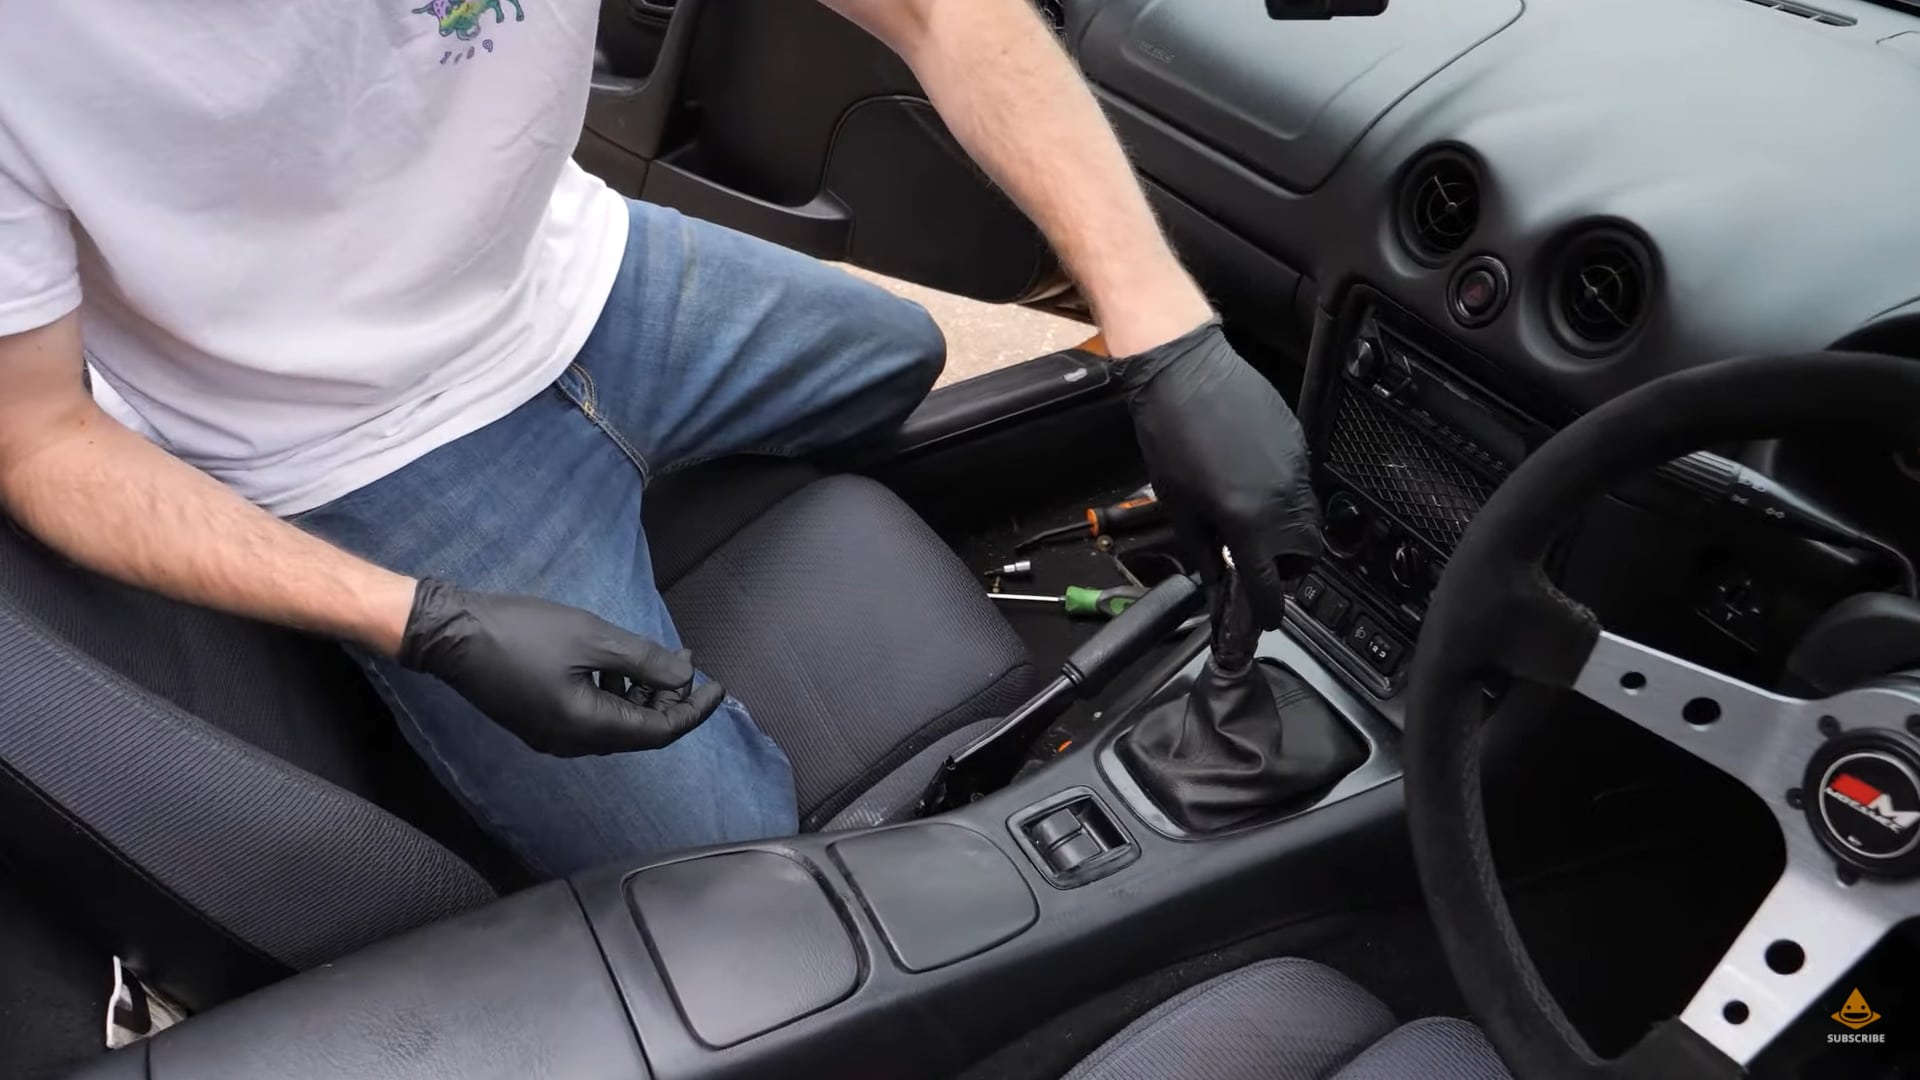
You want to start the rebuild process by removing your centre console, to get the centre console off you’ve got to first unscrew your gear knob and put that to one side. You’ll then have 5 Philips head screws to undo to remove the centre console.
Once you’ve taken the screws out, the centre console should come off with relative ease. 
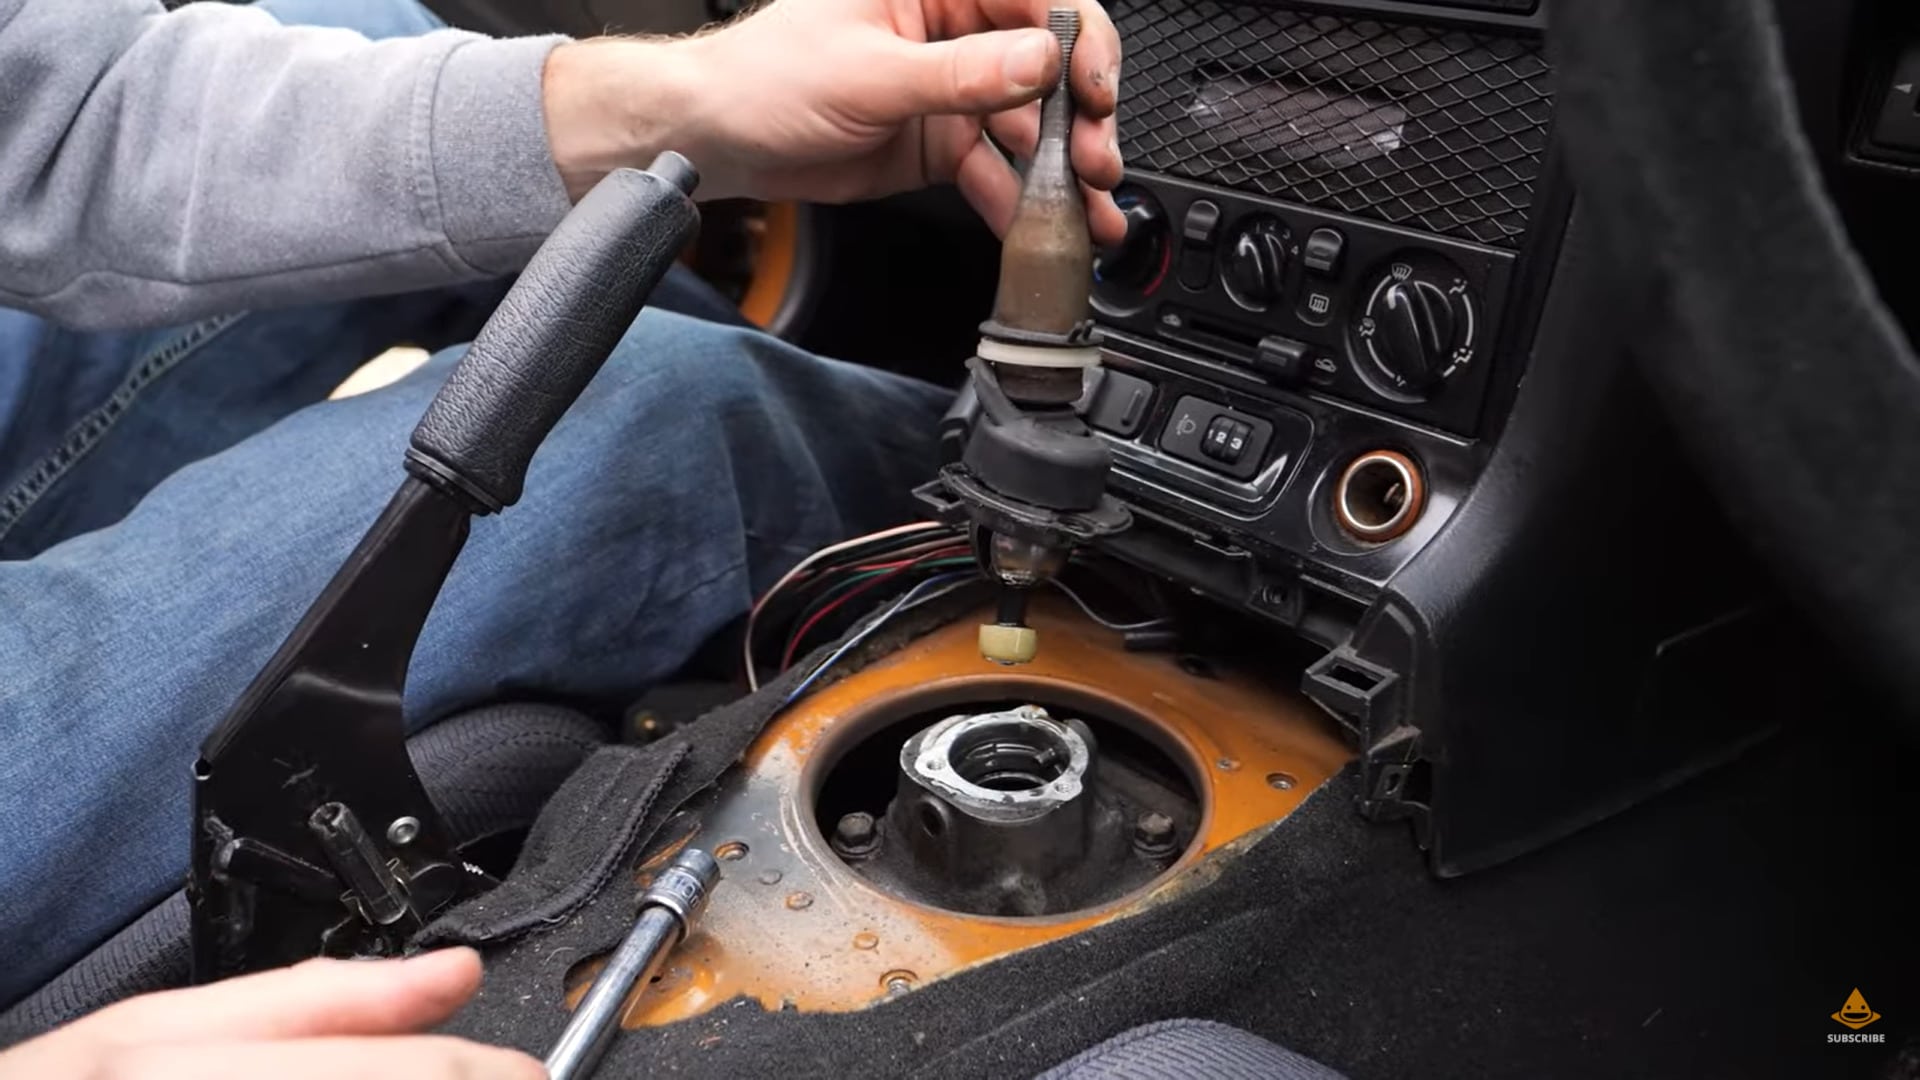
Next step is to remove the upper shift boot. When your centre console is first removed, this is when you’ll see the condition of your upper shift boot, as a matter of principle it’s a good maintenance item to replace, especially if you haven’t ever inspected it before. You can see the condition of Dan’s boot leaves a lot to be desired to say the least, his lower shift boot is actually also so deteriorated that you can see the pivot ball bushings inside the shifter mechanism.
Four 10mm bolts need to come out to remove the upper shift boot. Keep these if you have got an OEM upper shift boot replacement. If you have got a Jass Performance upper shift boot to replace it with, this comes with new hardware to replace the old bolts.
Your experience removing the upper shift boot may differ depending on the condition of it, you can see we were dealing with a totally disconnected one here, if yours is in better condition, it’ll still be connected to the shifter shaft by the retaining ring, in which case, you’ll have to remove this at the same time to totally disconnect it, they can be tough to get off but a bit of WD40 should do you well here in sliding it off.
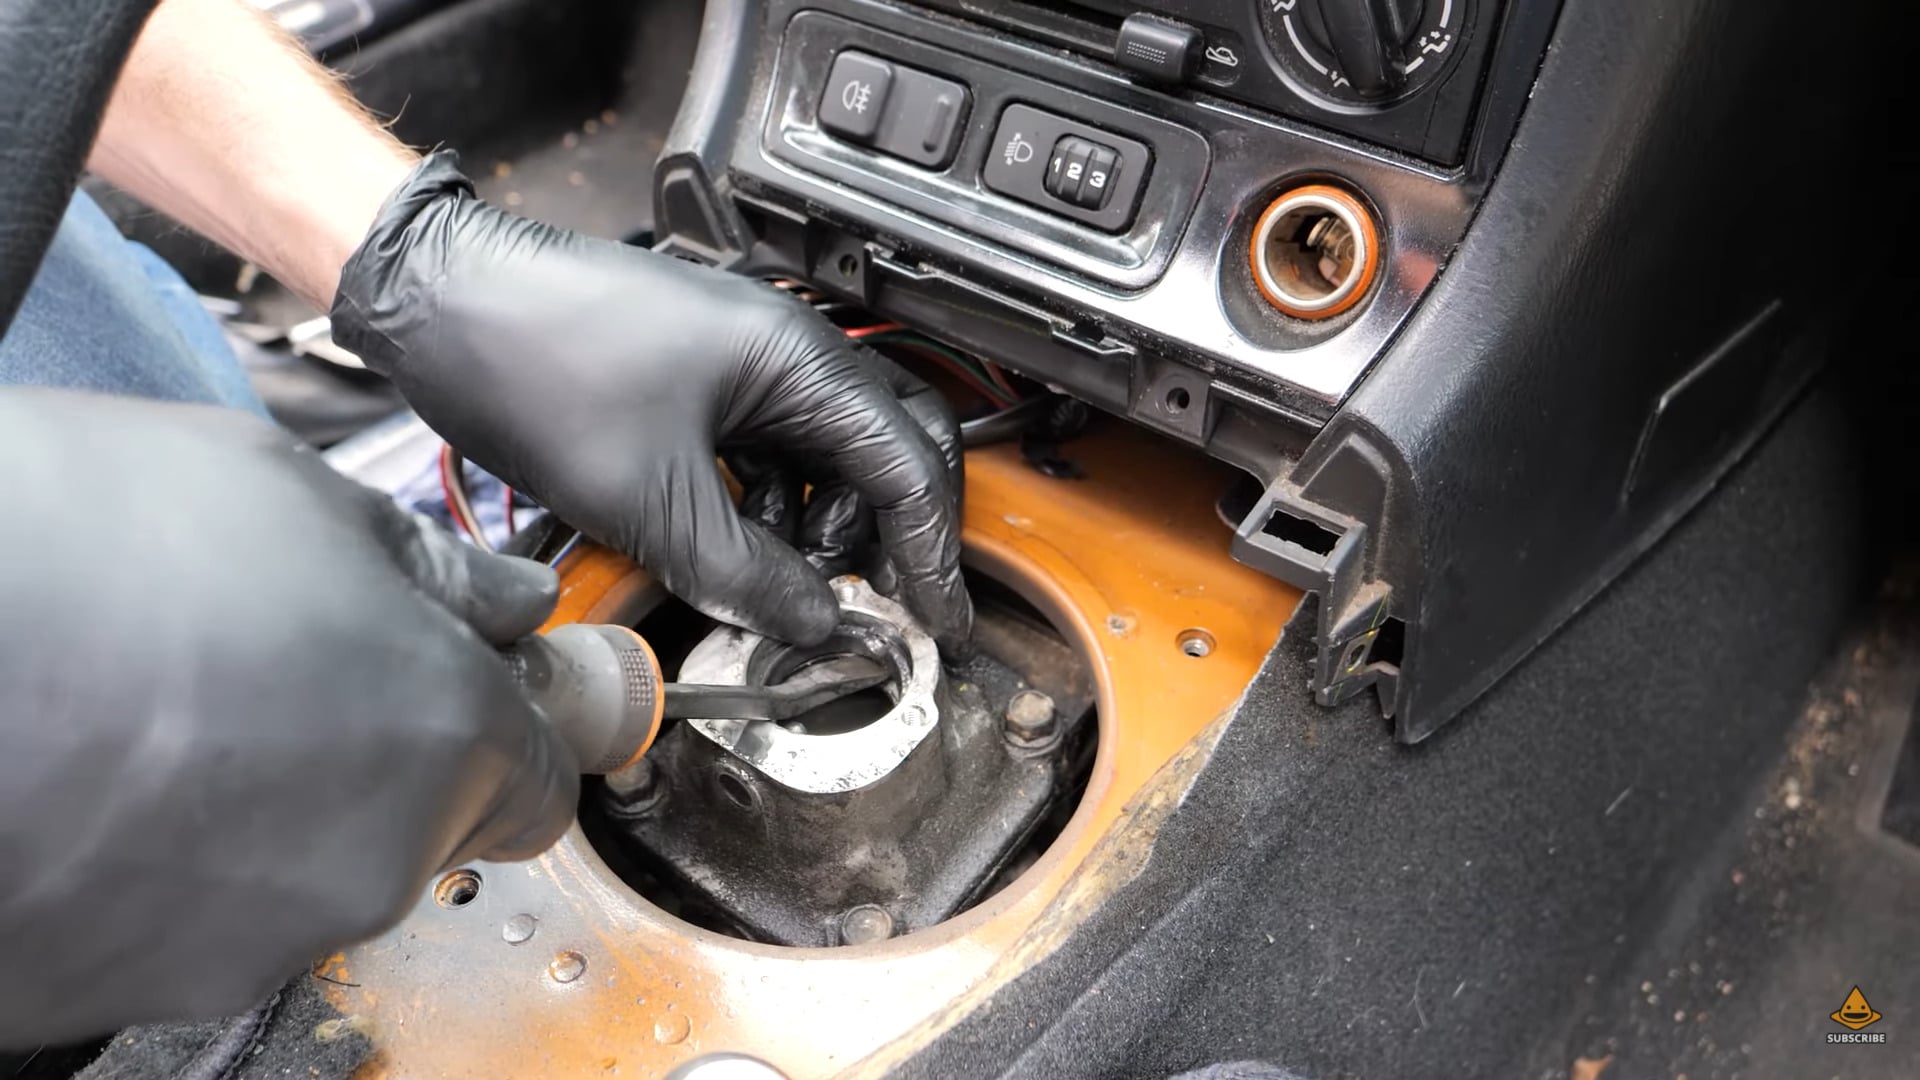
Once the upper shift boot is removed, next its time to remove the lower shift boot, this will free the rest of the shifter assembly from the shifter housing. There is 3 10mm bolts holding in the upper shift boot, remove these to free the shifter assembly.
Next you’ll want to remove the rest of the bushings from the shifter assembly, the pivot ball bushing just pushes off the end and the lower shift boot should slide back over the top of the shifter, like in our video, it did take some persuasion and a bit of cutting rubber off the old lower boot to make it clear nicely but it can be done with relative ease. Now just remove the remaining upper pivot ball bushing and tabbed wave washer which should be clipped together.
Grab your new tabbed wave washer and upper pivot ball bushing and clip them together, slide that back over the shifter, then get your new lower shift boot and slide that back over the shifter too, The lower shift boot may require a little lubrication to slide back onto the shifter nicely.
Now to remove the lower pivot ball bushing, lower wave washer and the old fluid before filling the turret back up, finishing re-assembly of the shifter and re-installing. It differs from year to year how many retaining pins will be in your shifter turret, they are there to keep in the shifter assembly and the lower bushings in place. Dan’s 5 speed NB1 has 2 pins in the turret however, some early 5 speeds only have a single pin which locates into a plastic bush on the shifter assembly itself. Whatever the case may be for your car, when you buy one of our kits, rest assured you will have all the correct parts for your specific year and model. All it means for us in this case, is we have to knock back the pin towards the front of the car to free up and change the lower pivot ball bushing. We used a socket extension and a hammer to knock back the pin pretty easily, then grab whatever tool you can find to pry the lower pivot ball bushing and wave washer up from the seat.

Once you have removed your lower bushing and washer, get your extraction tool of choice and extract as much of the fluid in there as you can.

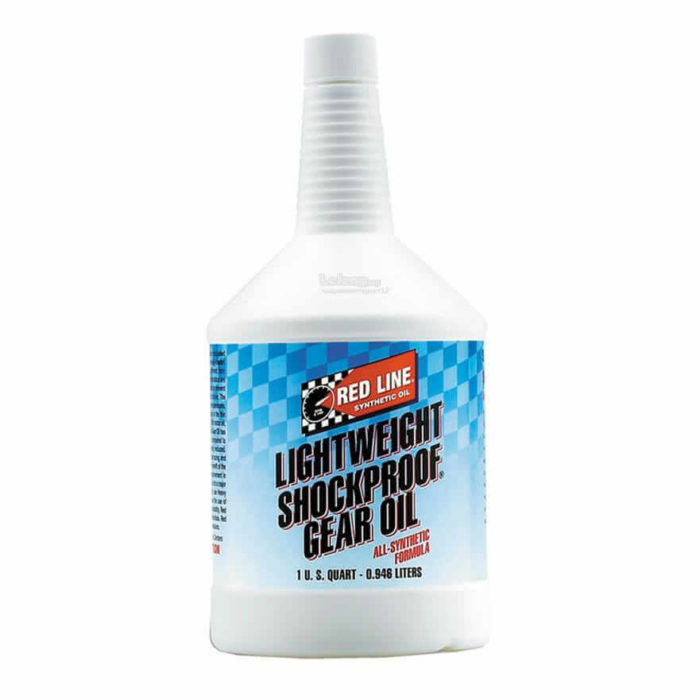
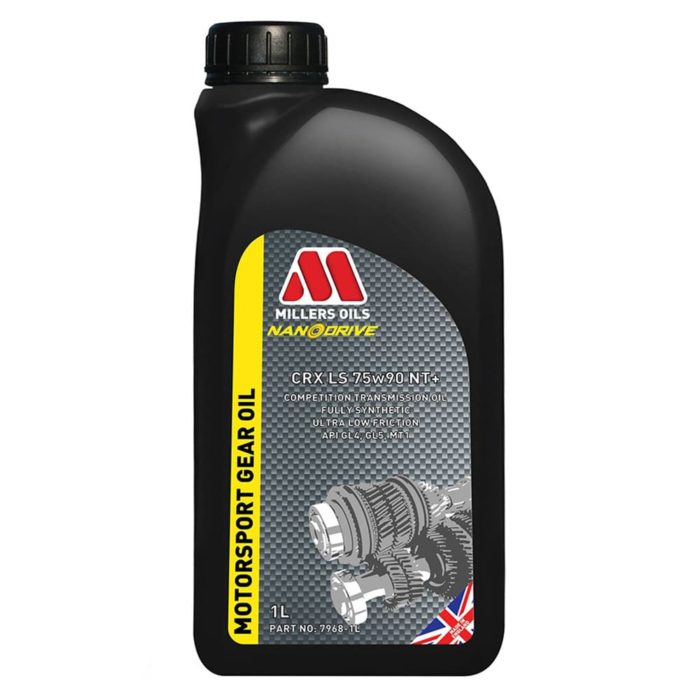
When filling the turret back up, we recommend Redline Lightweight Shockproof Gearbox Oil or Millers CRX 75w90 NT Plus Transmission oil, both are great options. There is no need to fill much past the lower bushing seat, see the picture below for reference.

Once filled up, start re assembly by putting the lower wave washer onto the seat and then the lower pivot ball bushing on top, aligning the lower pivot ball bushing with the pins, then with your pry tool, knock the pin back into place.

Next if you have specified a Beatrush bush you will want to add some grease to the inside to help align it with the seat easier, if you have an OEM bush, it’ll fit more tightly. Then drop the shifter assembly back into the turret and adjust the position until the bushing seats properly.
You’ll then want to align your lower shift boot with the bolt holes, and tighten them down, not too tightly as you’re tightening into soft metal and could quite easily ruin the threads.
Now you’re done with the shifter assembly, time to re-install your upper shift boot, The process is the same for the uprated Jass Performance version and OEM, just the 4 bolts on each corner of the boot to tighten it down and slide the neck of the boot over the shifter with the retaining ring.

Lastly, re install your centre console with the same 5 Philips head screws from earlier, and screw your gear knob back onto the shifter!
And with that you have fully re-built your MX-5 Shifter! It makes all the difference, get ready for tight, precise gear changes! To see Dan’s reaction to the before and after of rebuilding his shifter, and to find out even more details follow this link to the YouTube video!
Browse our range of Shifter Rebuilds Below:
-
From: £53.55 inc. VAT Add to basket
-
-
-
-
-
