We’re a little bit obsessed by differentials here. Its one of those dark arts that people rarely touch and when they need to be rebuilt, you send it off somewhere. We like building stuff, clearly we were the kids that took their toys apart and we like to think we can put them back together again too.
Well for anyone looking to get themselves a Torsen to bolt into their MX5, Miata or Eunos Roadster then you should consider refreshing the unit, especially if you’ve no idea of the history.
The parts you’ll need are all going to be the same as if you were putting an insert into an open differential – covered here. The main difference is the tools you’ll need – and granted, this one is a little more specialised and it might pay dividends to just bung a friend a crate of beer to use their press or tools.
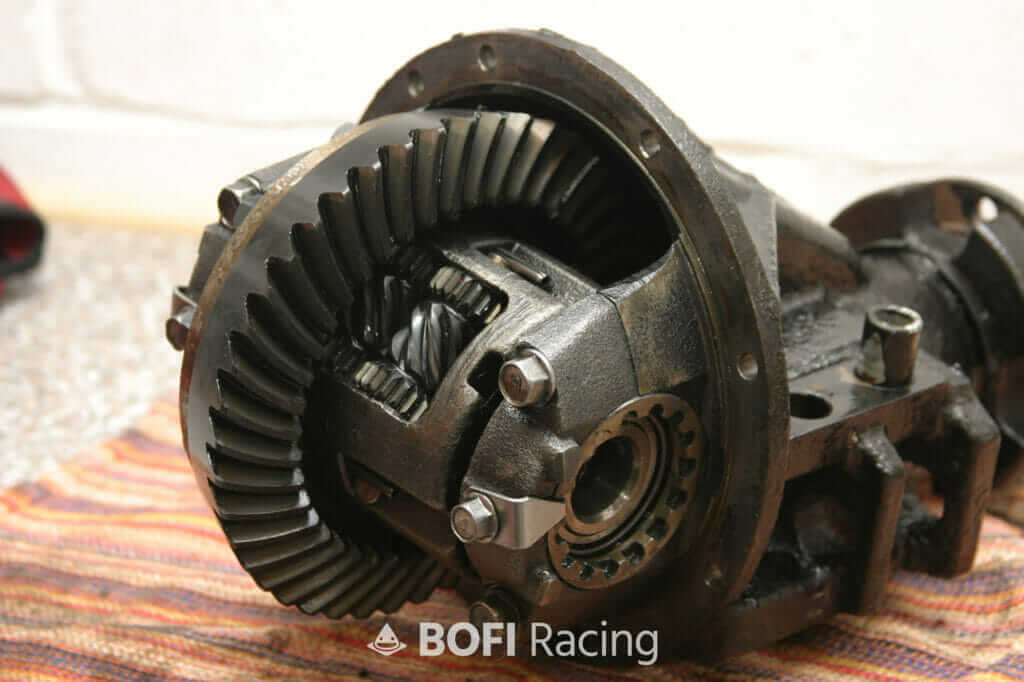
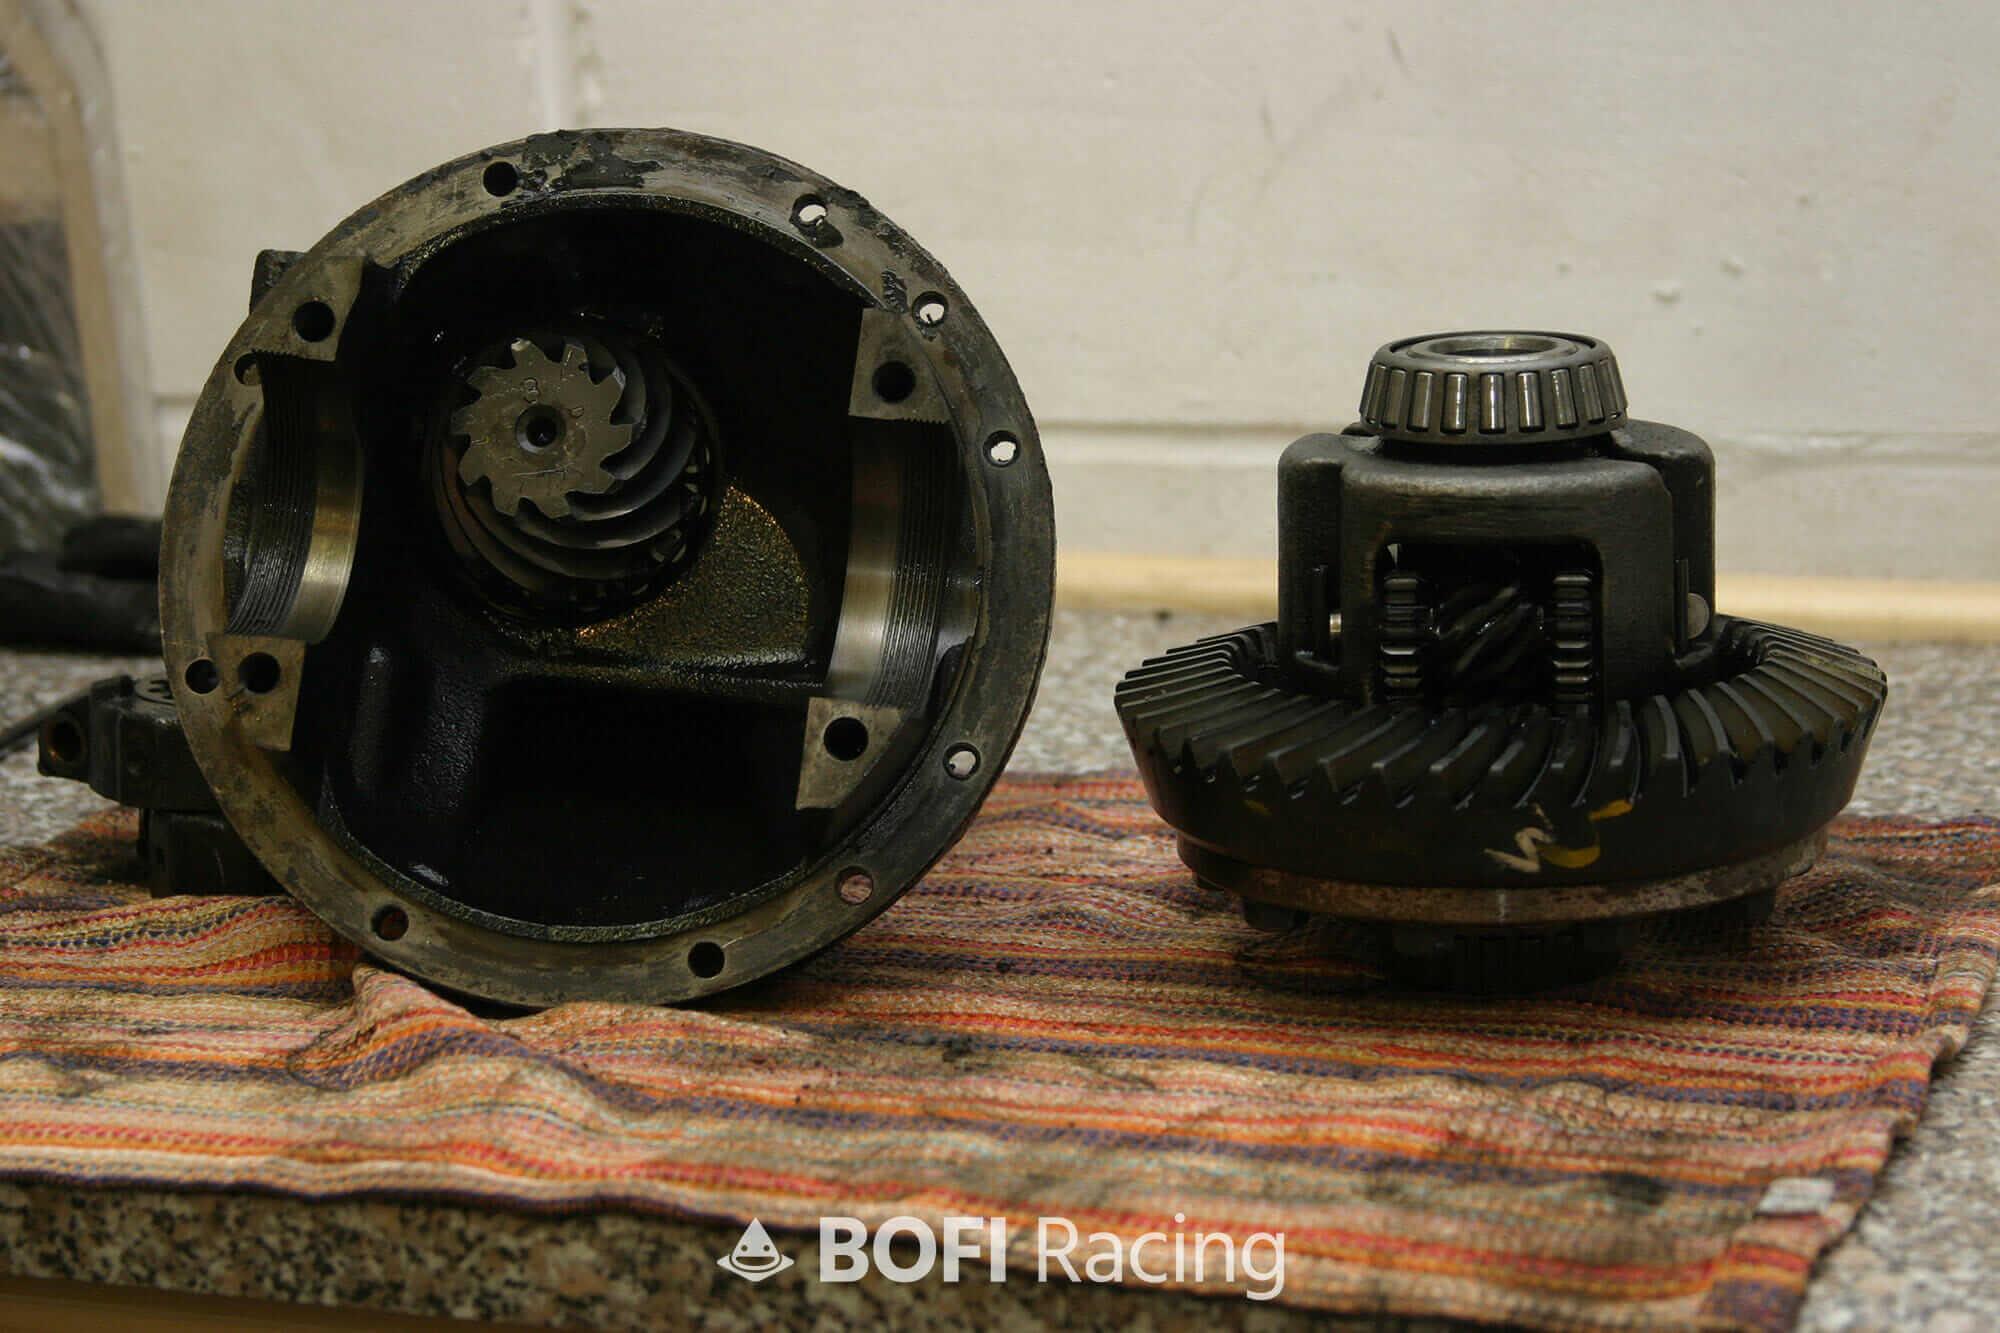
Anyway, I thought it would be useful to take you through the process and get a few beauty shots of the Type 1 Torsen and perhaps explain a little about its operation along the way.
This diff has been sat on my workbench for the better part of a year, waiting for me to rebuild it and to have a car to put it in. It’s a fairly rare 4.3 (1.8 case) Torsen Type 1, only made for a few years from 94-96 i believe (they changed to type 2s later) and also only available on special editions like the S Special and the RS Limited.
So we have to do it justice here, the parts we’re going to need to replace are in the table below, I’m using high quality Koyo Bearings, because I’m a bearing snob.
| Part | Quantity | Mazda Part Number | Bofi Part Number |
|---|---|---|---|
| Side Seals | 2 | MA02-27-238A | 102-040-001 |
| Carrier Bearings | 2 | 0221-27-350 | 091-038-001 |
| Pinion Bearing – Inner | 1 | M025-27-210 | 091-038-002 |
| Pinion Bearing – Outer | 1 | 0755-27-210 | 091-038-003 |
| Crush Tube | 1 | M035-27-171 | 102-038-005 |
| Pinion Seal | 1 | MA02-27-165A | 102-040-002 |
The material cost for all these parts is £80-£120, if you’re planning on doing this job – do it once and do it right – it’ll be good for another decade or more.
There are a few key differences you will need to look for if you’re checking a car with a Torsen, firstly the age old “put her on stands, run the wheels and try to stop one” trick doesn’t work with a Torsen.
You have to apply some torque to each wheel otherwise it acts just like an open diff. On a car this isn’t an issue for all but the most horrible mud bog – but you can test it by putting the handbrake on a little. This will generate enough torque load on the different wheels for the magic to start happening.
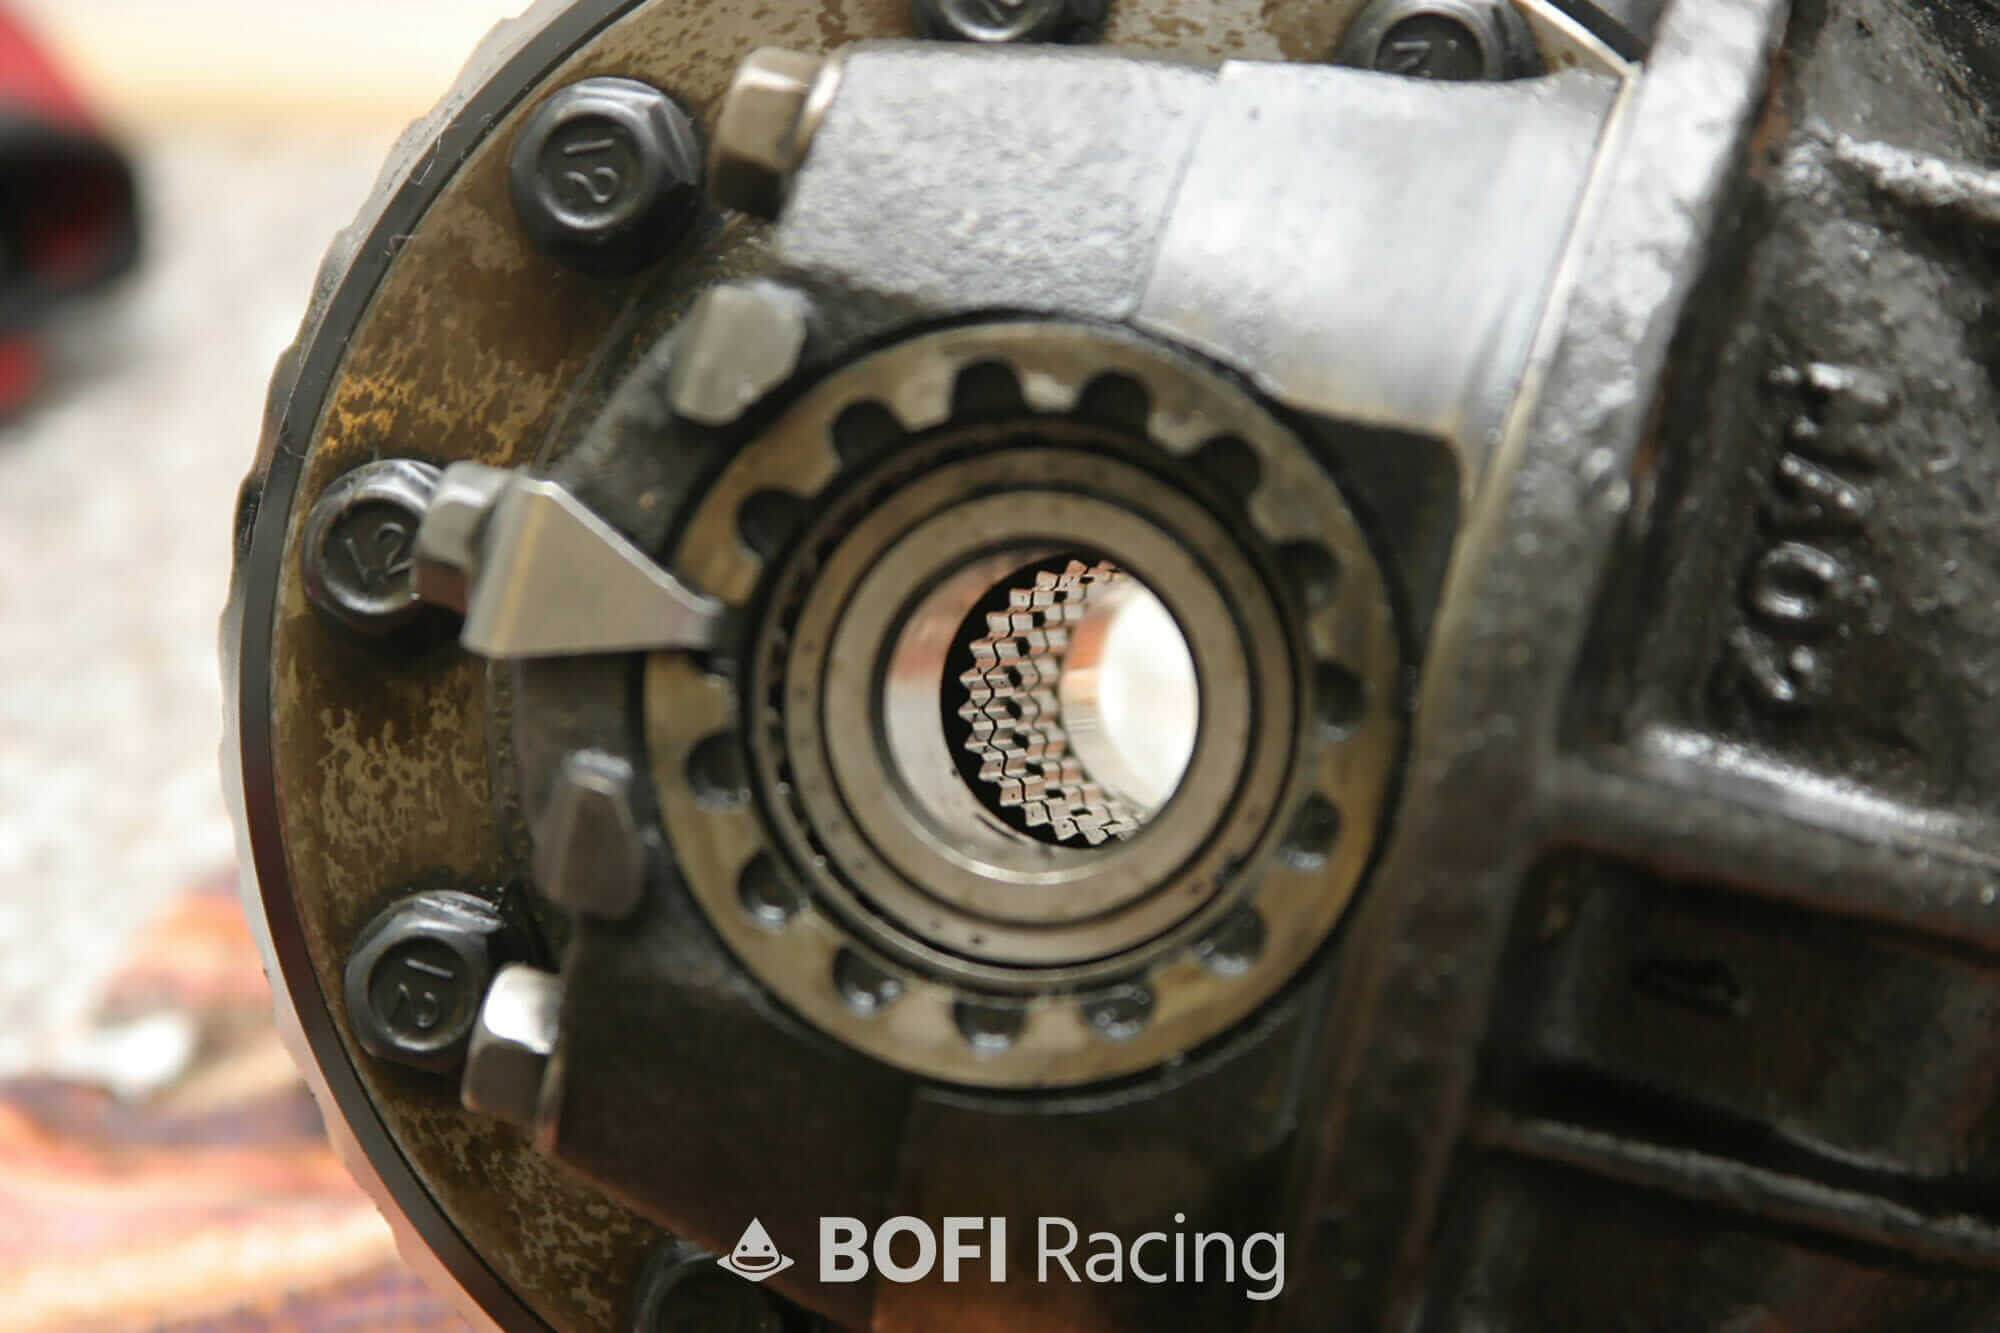
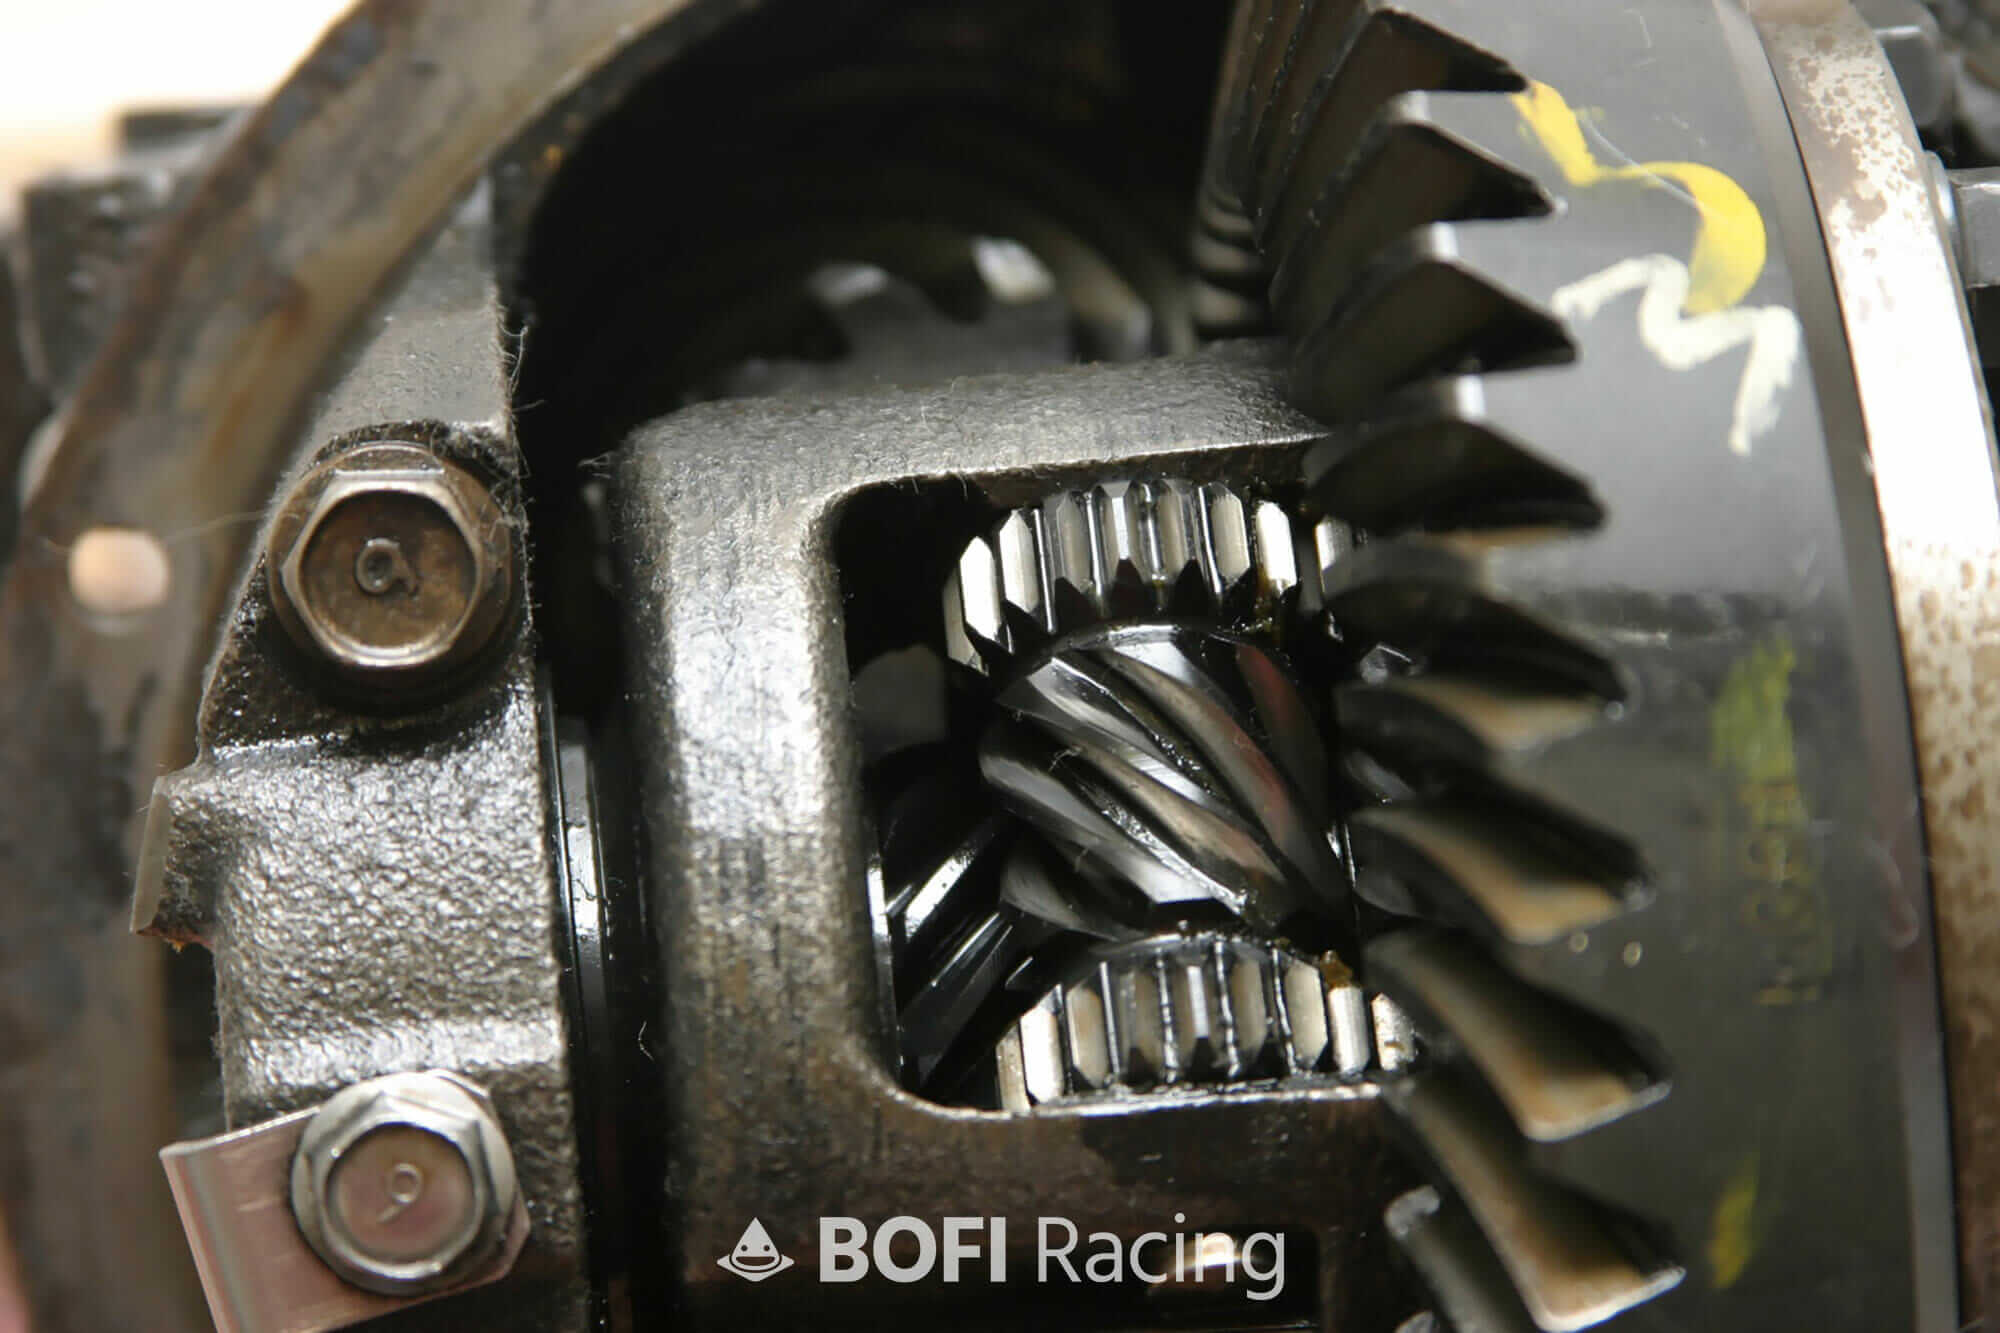
Like most LSDs, the type one has no obstruction through the centre. It is possible to verify this on the car too if you remove a shaft.
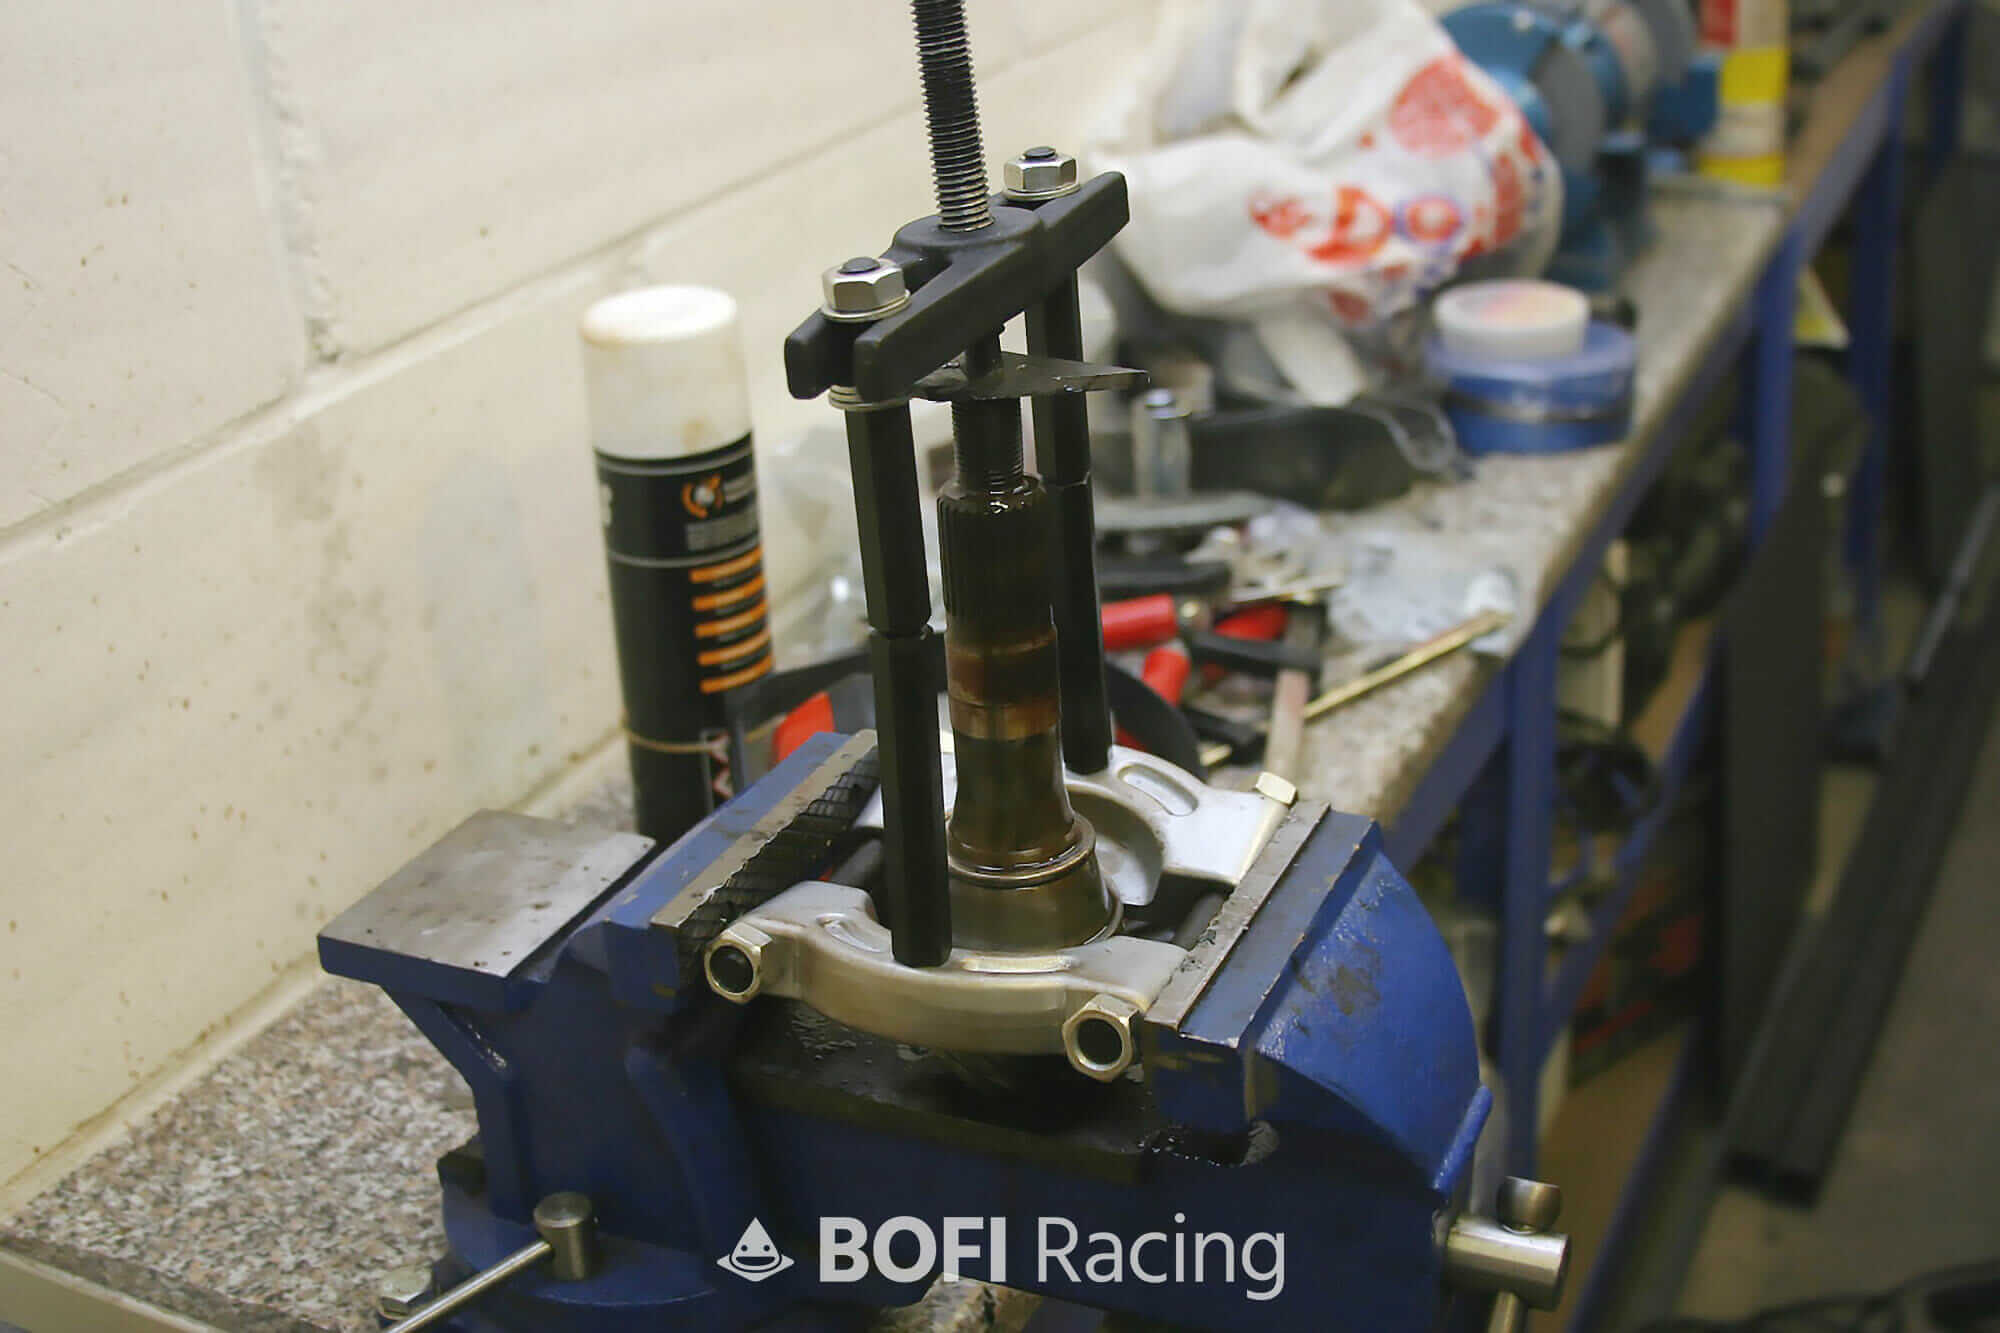
The biggest pain with this whole build is removing the existing bearings, there are 4 in total and they are all press fit on from factory. You’re going to need a couple pullers and some patience to make this happen. A specific Bearing puller for the pinion and a (small jaw) 2 jaw style for the differential side bearings.
We used a frankly rubbish cheap-o bearing puller for this job, something like this but really if you have a friend with a good one – borrow that, as these cheaper units tend to bend and break!
For the side bearings we had to call in a favour but you’ll need something like this – it has to be a small 2 jaw with thin arms – you can get an idea how it would work in the picture below.
Once you have the differential unit out (which if you’ve been following our how to guide that’ll have come easy), you’re left with the more daunting task of taking the pinion out of the case. The crown wheel will come out attached to the differential unit itself.
Let’s put it this way, you’re going to need a hammer. A pretty sizeable one at that and ideally some way of supporting the case while you wail on the top of the pinion shaft – you want to push the pinion INTO the case to force it out of the bearings.
Here’s where i get to sit back and laugh, my pinion shaft literally fell out of the rearmost bearing with all but a light tap. What followed was a load of orange rusty dust – this ladies and gentlemen is why we check out new-to-us diffs that have been sat around for a while.
I will say that in my possession, regardless of being sat on a bench it’d been regularly oiled and was even treated to the occasional night out. I jest, but I did fawn over it for a while.
That’s one bearing down anyway, just the larger – more difficult one to get off, as well as the bearing race within the case itself. The bearing rides against its race which is press fit into the differential case, getting these out isn’t difficult but you need to be a little precise and tap them out with a punch.
For a precision instrument of opposite lock, building differentials largely involves lots of swearing and bashing with hammers.
Once you’ve used your cheap Chinese bearing puller kit and bent that all to hell, you’ll have a nice clean bearing free pinion shaft. Oh matron.
To fit the new lower bearing to the puller (don’t forget the shim) simply make sure you’ve given the pinion a light wet sand with 2500 grit to get rid of any high spots you might have made and place it in the freezer for 24 hours.
Yep – the freezer. If you have a press you don’t have to do this, but still it makes life easier. Get your bearing and put that in boiling water for 15 minutes or so, if the stars align you can just slip the bearing on without any issues. After about a minute or 2 they’ll be fully seated together, so work fast and make sure you’ve bottomed them out.

Replace the bearing races in the carrier, put the crush tube on the pinion and insert it into the carrier. You’re just reversing the procedure you did earlier – you’ll end up sandwiching the pinion between the 2 bearings.
You’ll need to button it up with the pinon seal, the flange and nut before everything sits nicely and the bearings seat fully. Snug everything up, you wont be able to do much more without the differential itself being in place.
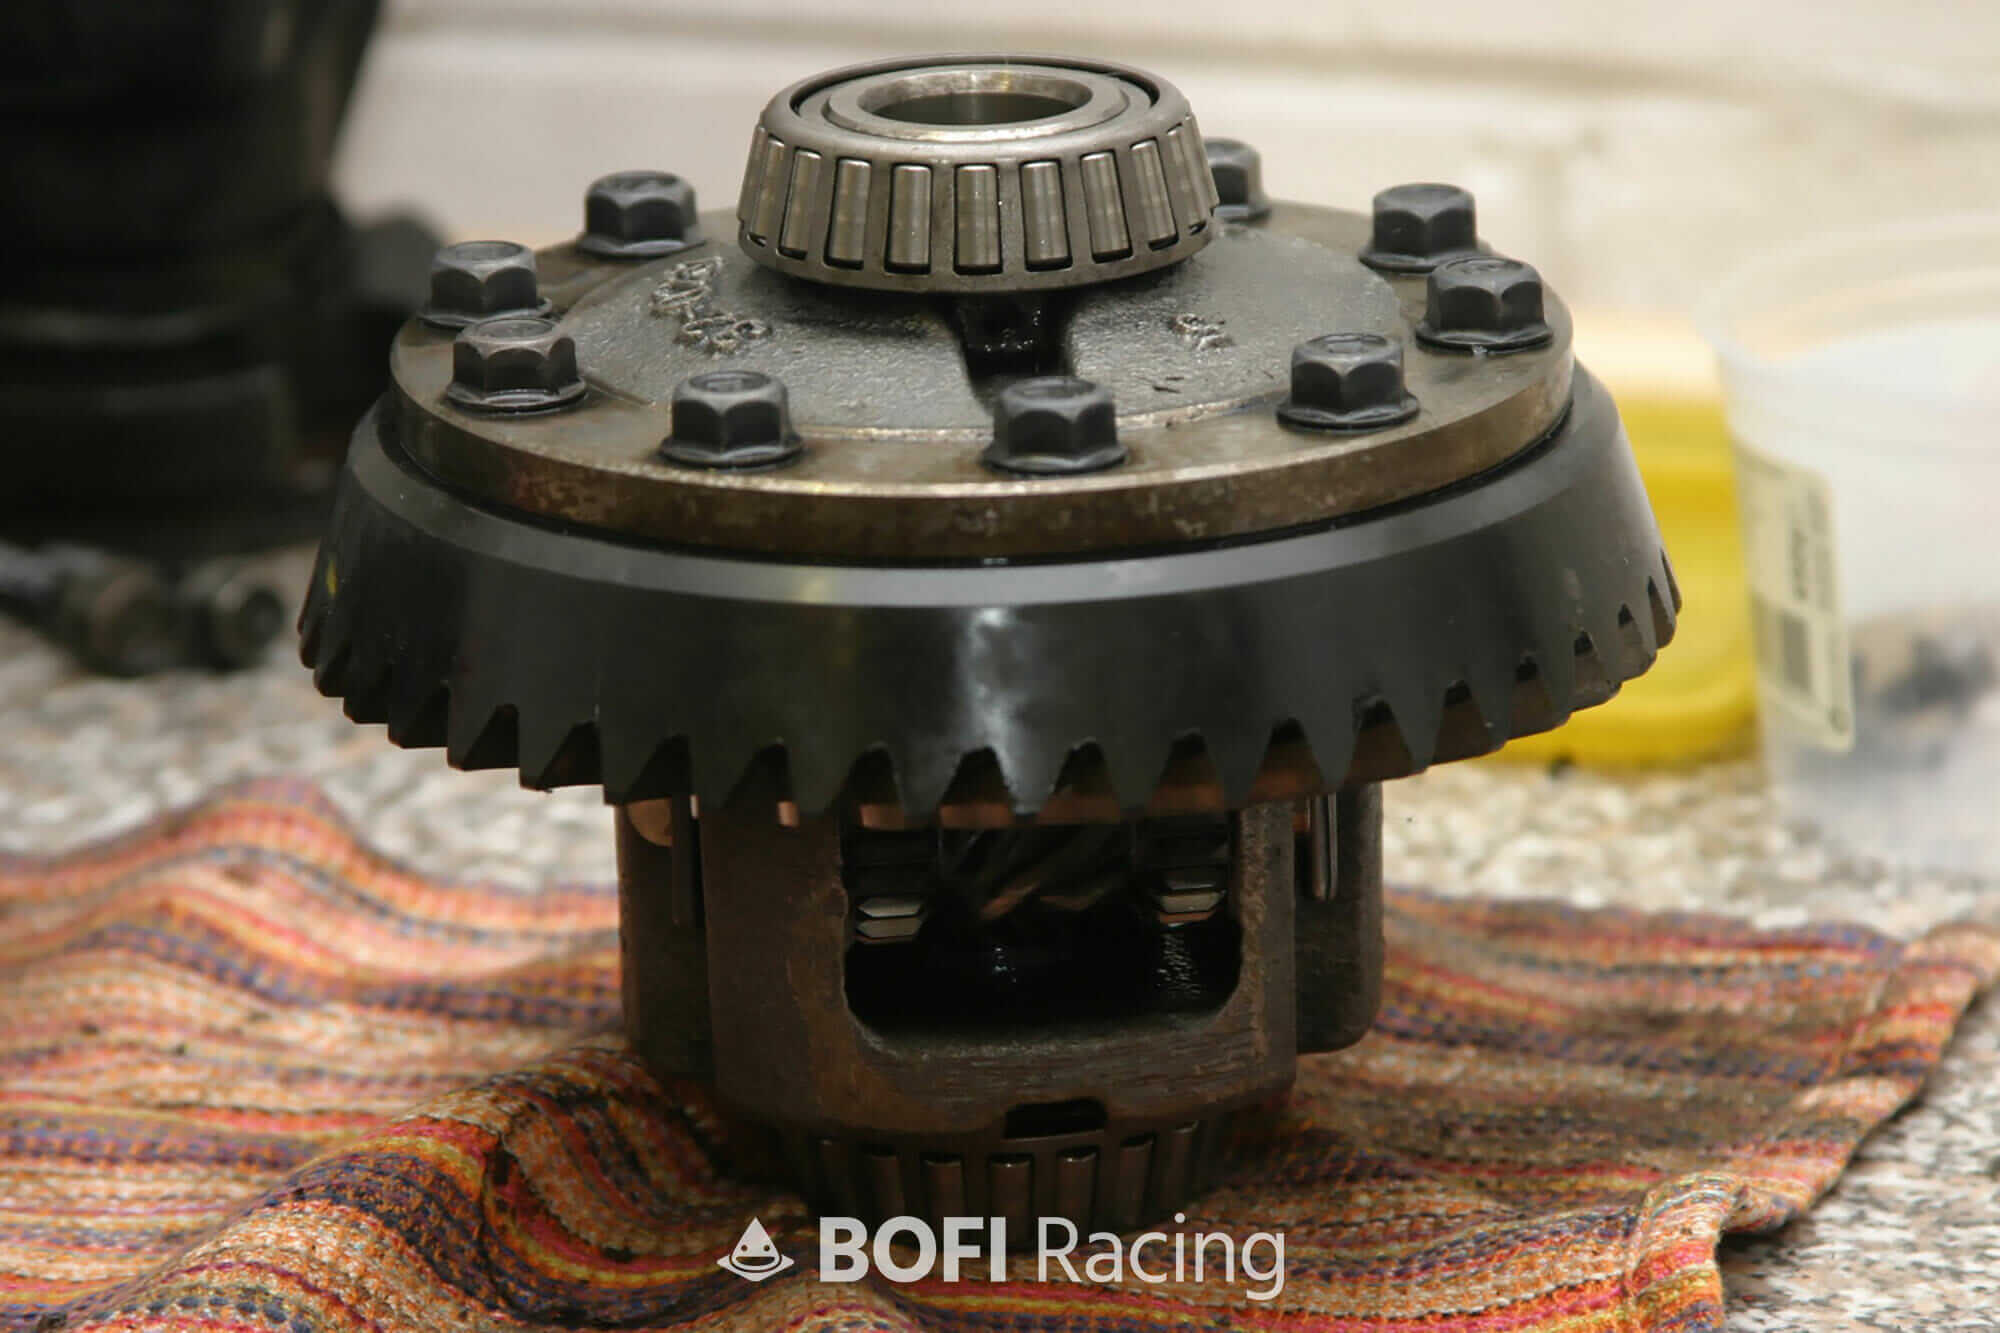
 With the carrier bearings on the Torsen itself, you will have needed to pull these off using the 2 jaw puller shown above and then simply offer up the new bearings and either “lightly tap” (see, bash) them into place or use a press.
The hardest part with these really is just getting them off, good tools make life so much easier.
With the Torsen offered up, follow the procedure on our how to guide on setting proper backlash to get it in the ballpark of where it needs to be. You’ll achieve this by using the adjusters for the side bearings.
Once you’re in the ballpark you’ll need to set the torque on the pinion and crush the new sleeve, this will move the pinion ‘in’ to the ring gear and will have an impact on your backlash measurements. You’re aiming for 12-15 INCH pounds of torque applied to the pinion.
When felt with your hand, it means there should be almost no measurable backlash and should take a reasonable amount of wrist force to turn the pinion.
You can easily make a tool, as we did to measure in/lbs as most torque wrenches don’t go that low. Take a 20 inch length of threaded rod, weld it to a plate that you can bolt to the pinion flange. Measure 12 inches from the centre of the pinion on the rod, and hang a 1 lb weight from that point.
It should take a tiny amount of pressure to get the pinion to drop with the force of gravity, if you’ve done that then you’re in the right place. Finish up by checking the backlash again and setting the side bearings as you need.
And that is pretty much that, no real magic here. Just take your time with it and don’t put yourself in a position where you have to rush – buy an open diff to put in your car in the meantime if you have to.
If you have any questions, please feel free to drop us a line via our contact page.
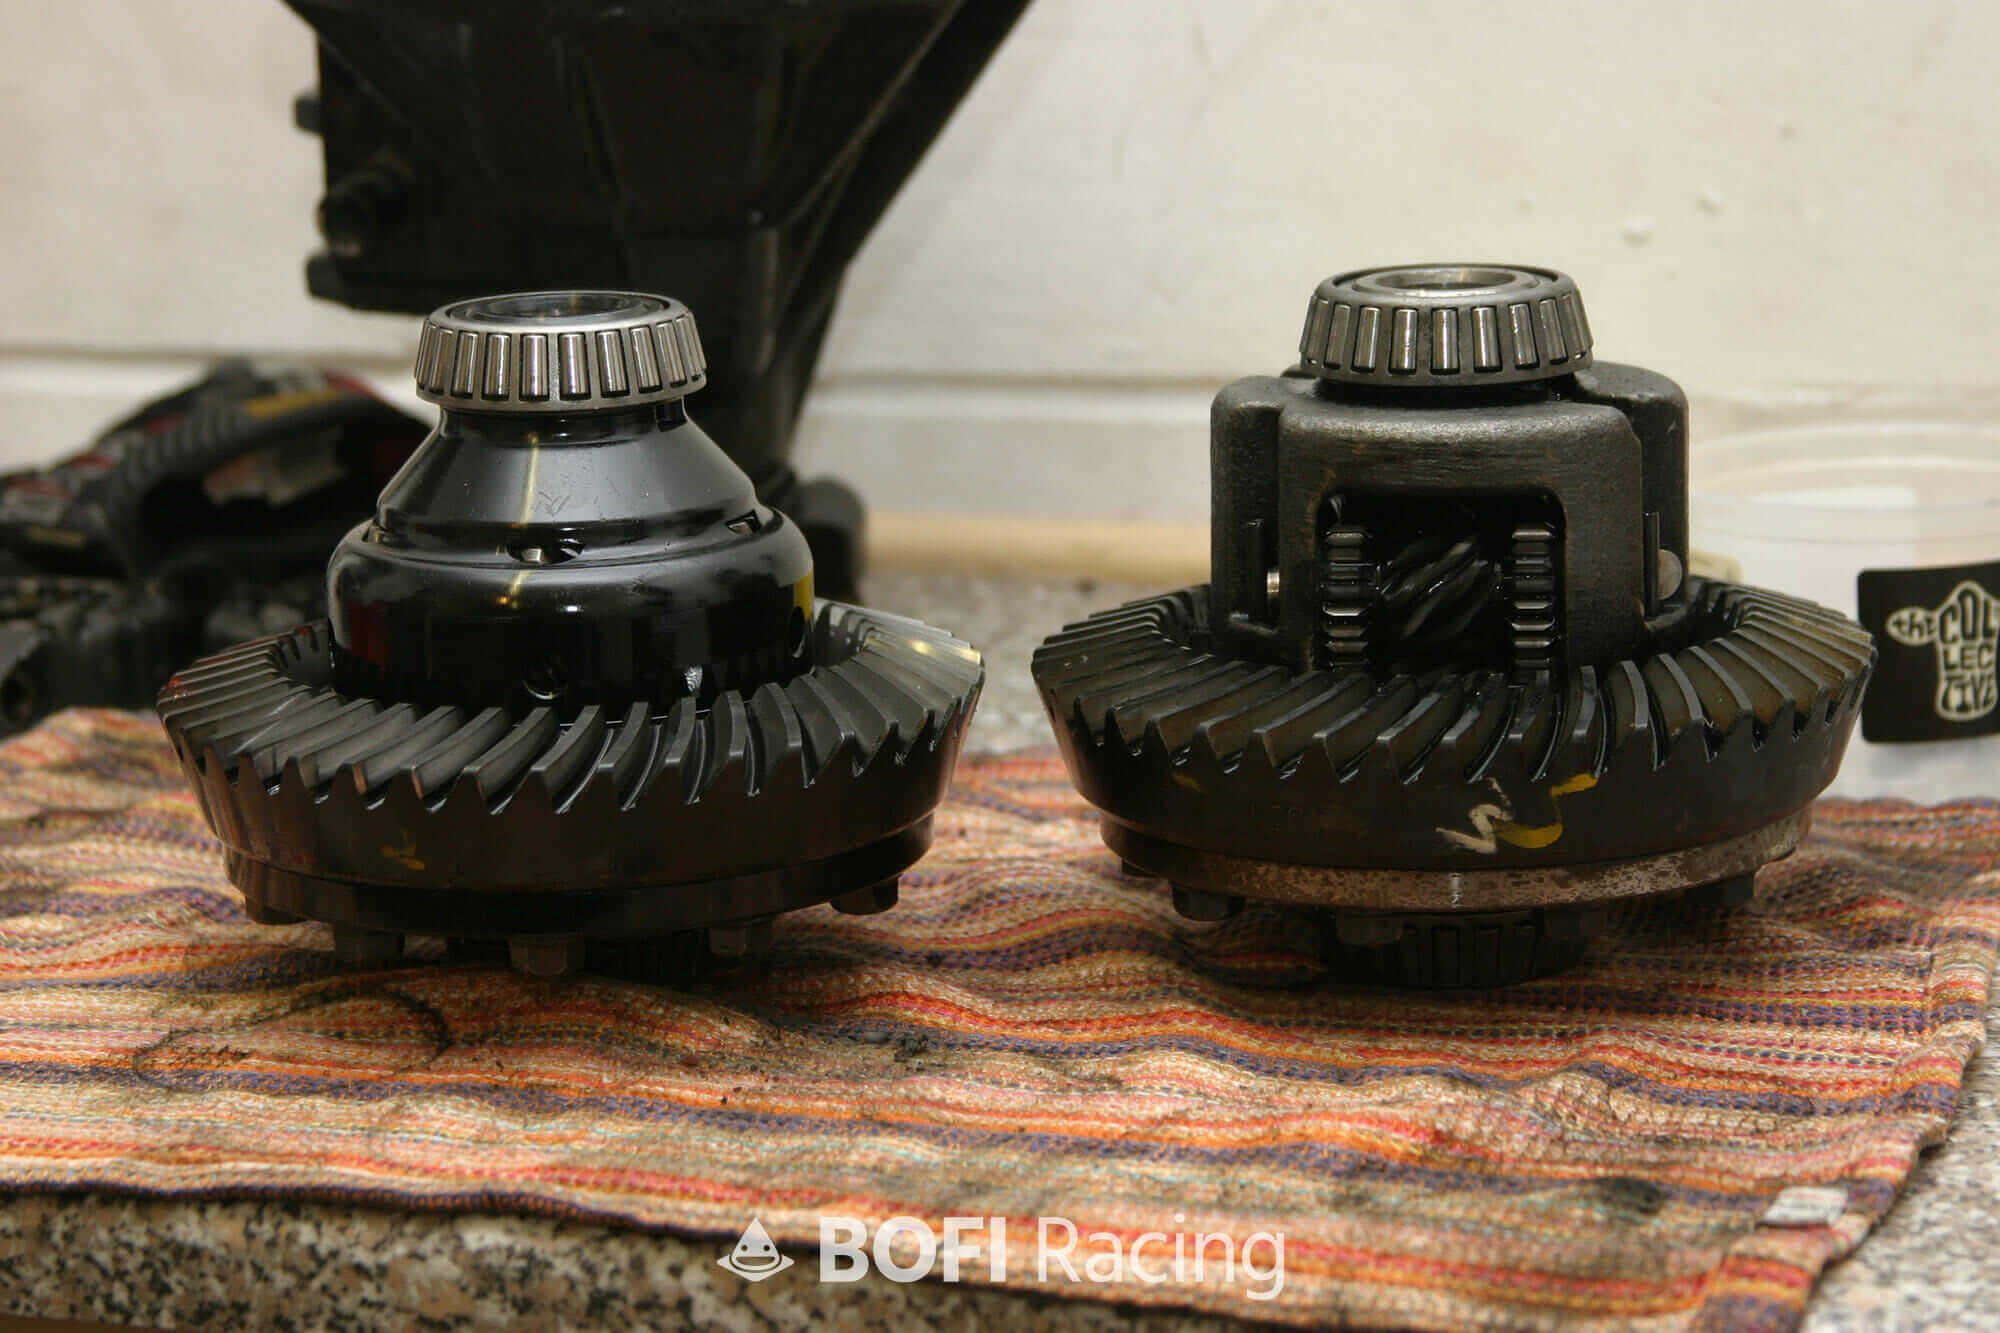
And just for some additional shots, here is the torsen centre compared to the ATB centre we wrote about;

3 comments
how would you be able to tell what condition the torsion centre is in while you’re changing the bearings? i.e. if its in good condition or needs servicing/changing (examples of type 1 & 2 if possible).
Hi,
My diff makes this noise: https://www.youtube.com/watch?v=isfI2RErvYE. Do you know if this tutorial will fix it?
Are you certain this is coming from the Differential? It’s certainly a nasty sound, deeper than the normal gearbox run down whine.
The answer is you’ll not know until you tear it apart, it might have wear to the ring and pinion and if it does, they will need to be replaced.
This guide will certainly give you everything you need to take it apart and put it back together.
Dan